Follow these easy steps to set up the InterviewFlowAI integration with Ashby
1. Get API details from InterviewFlowAI portal
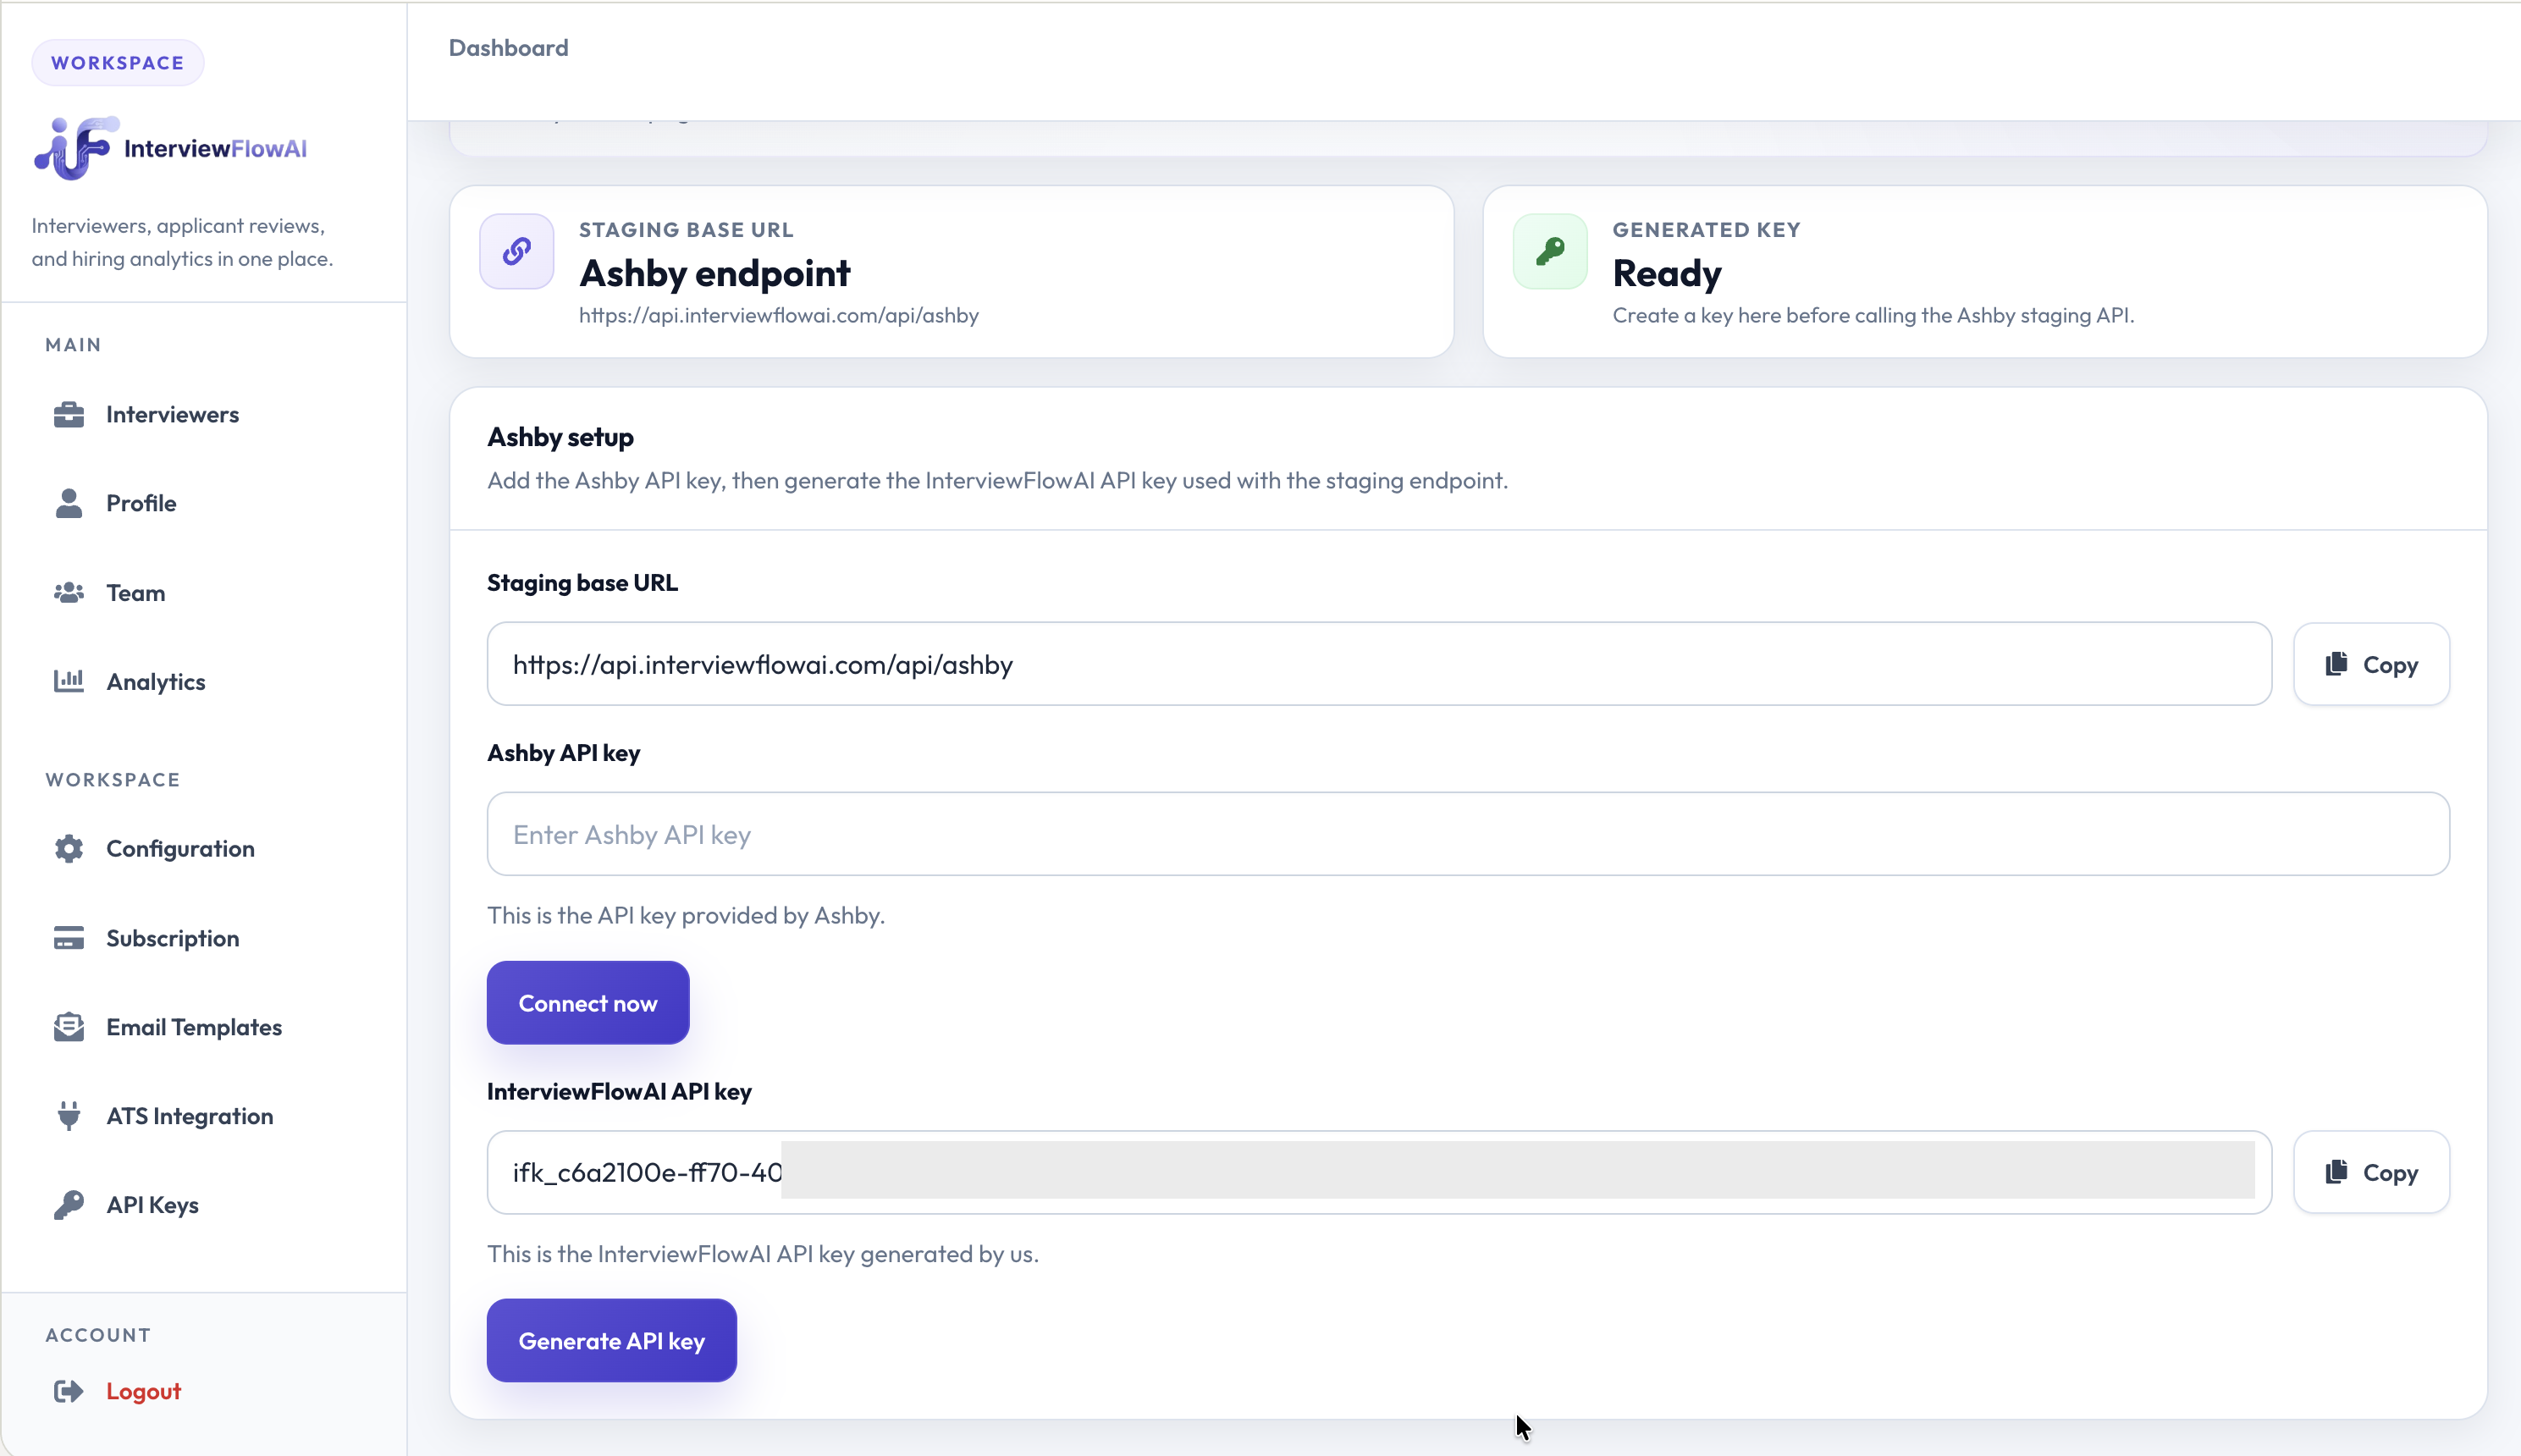
- Log into the InterviewFlowAI Dashboard.
- Copy the InterviewFlowAI API key and the Staging Base URL. Keep these details handy in another tab for the next steps.
2. Configure the integration in Ashby
- Go to Admin in Ashby, and navigate to Integrations.
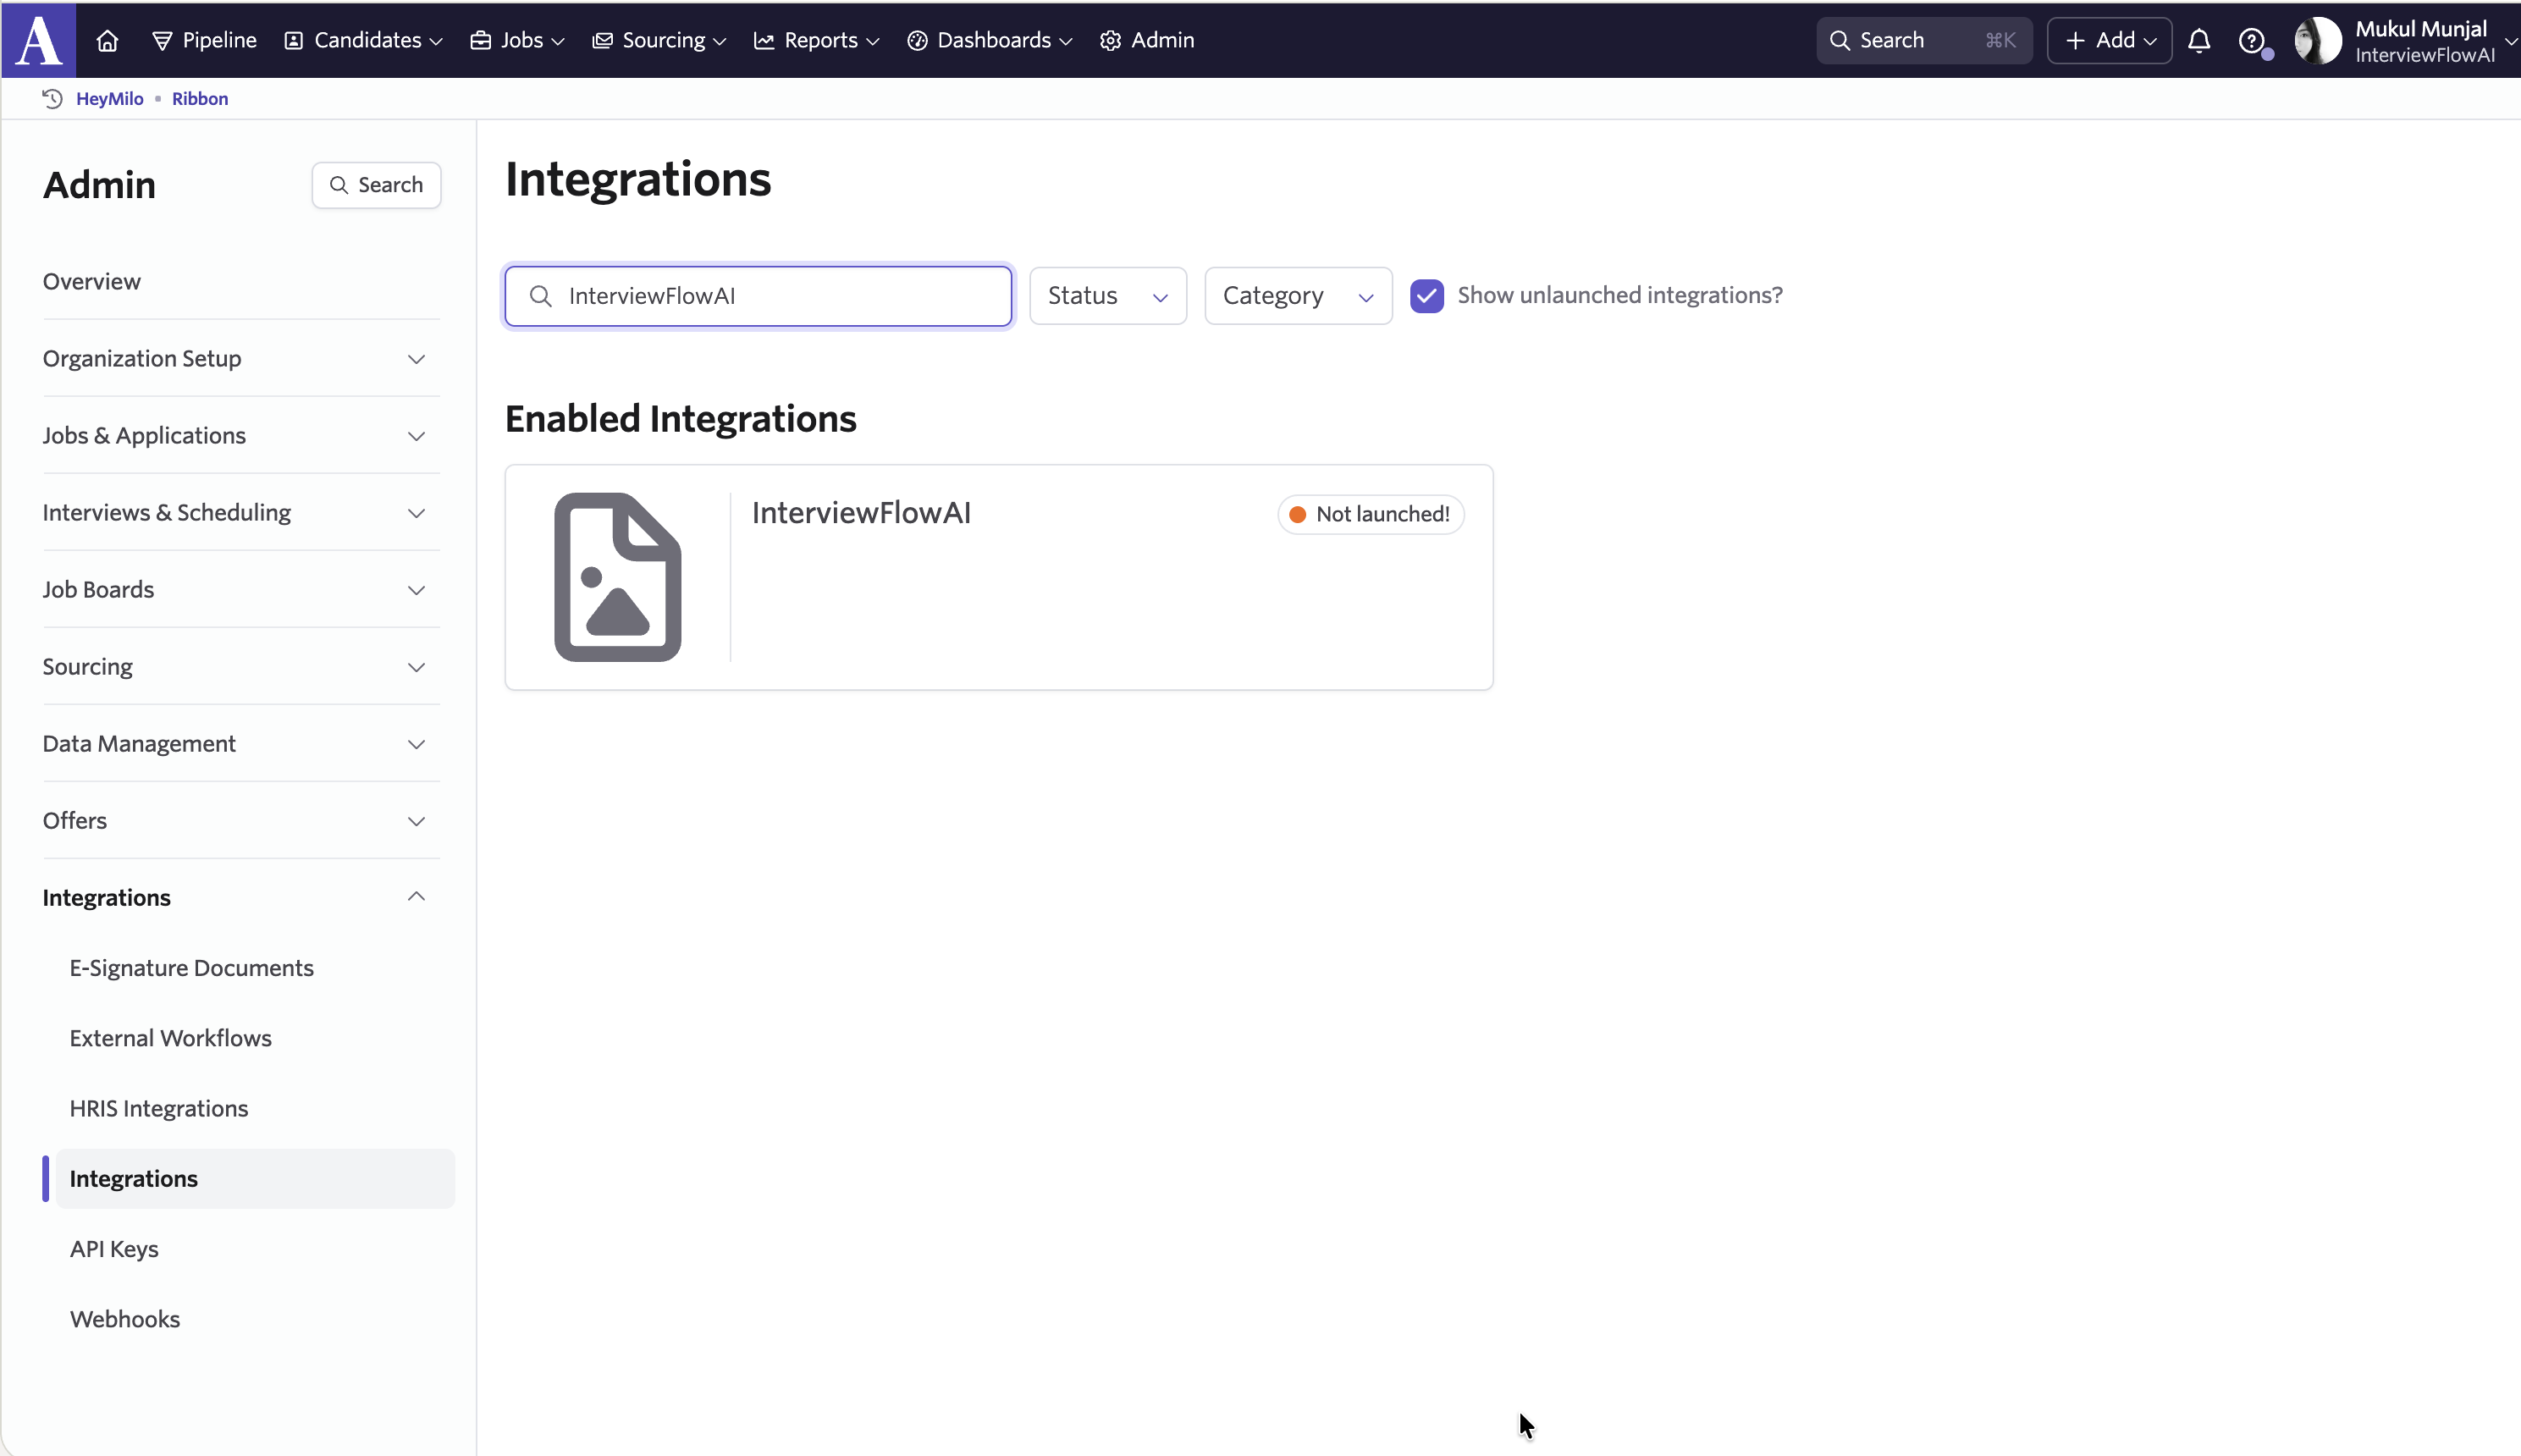
- Select InterviewFlowAI from the list of integrations.
- Paste the InterviewFlowAI API key and Base URL into the respective fields.
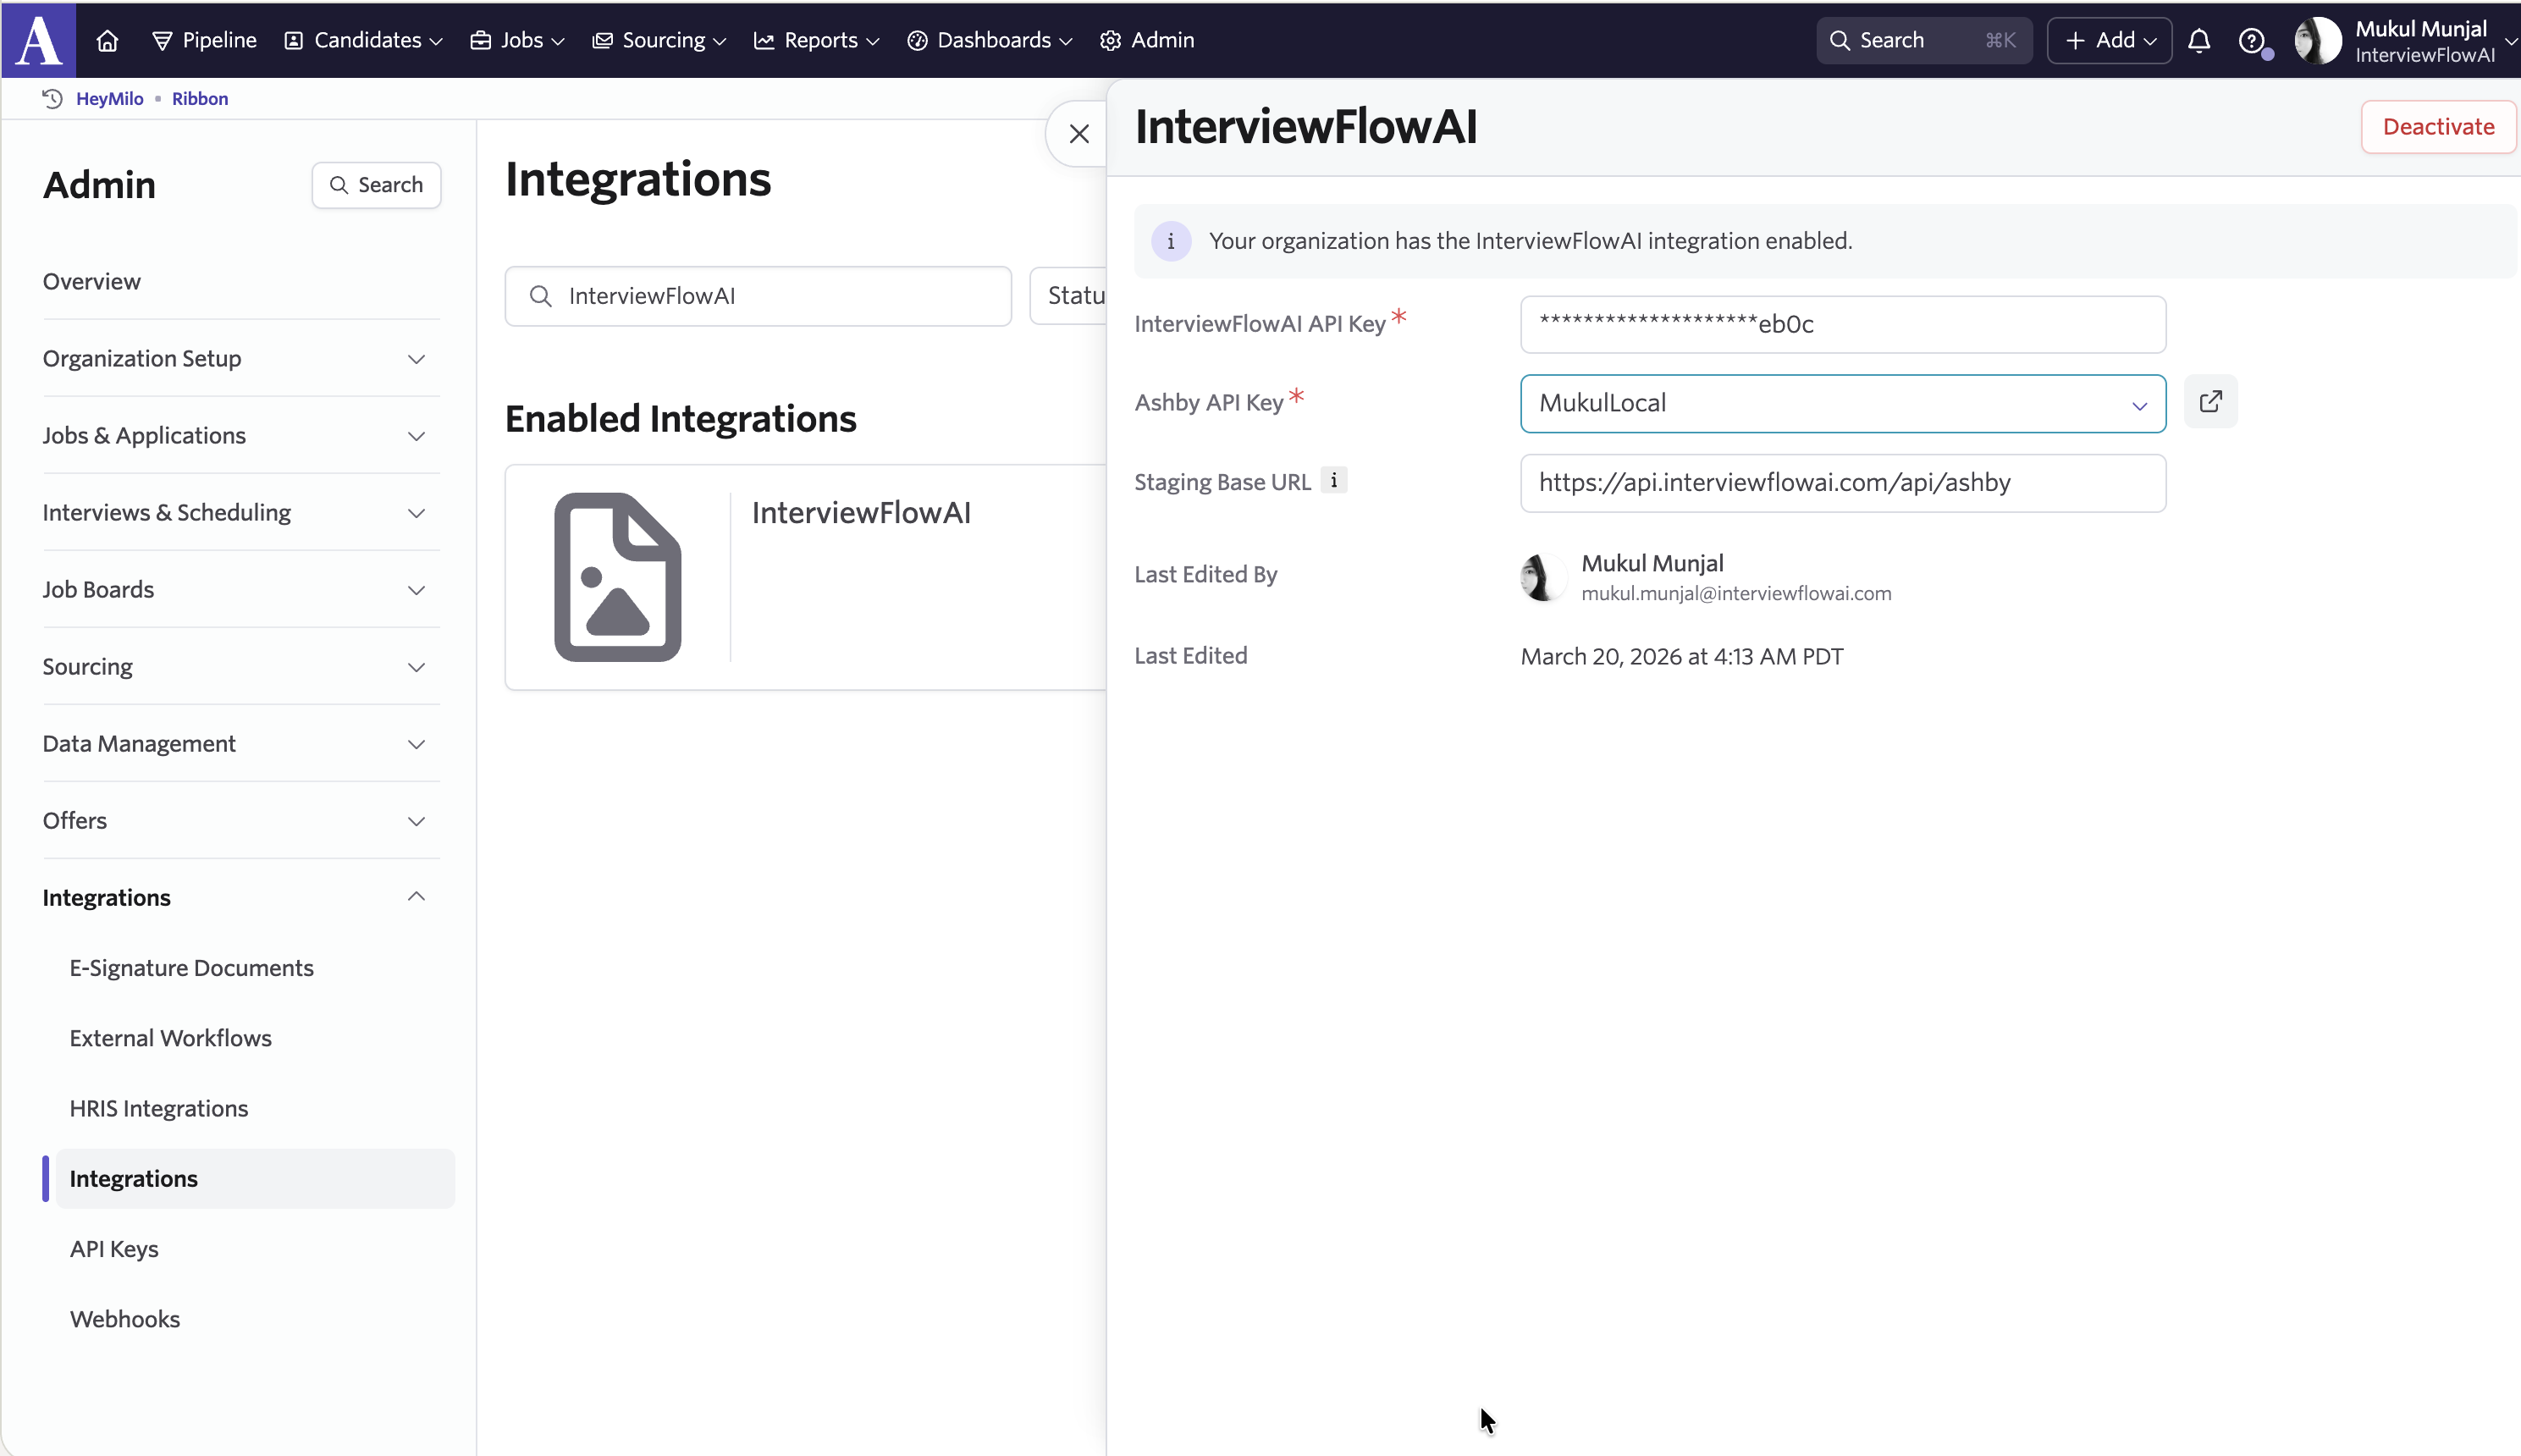
- Generate the Ashby API key. Ensure the generated key has at least
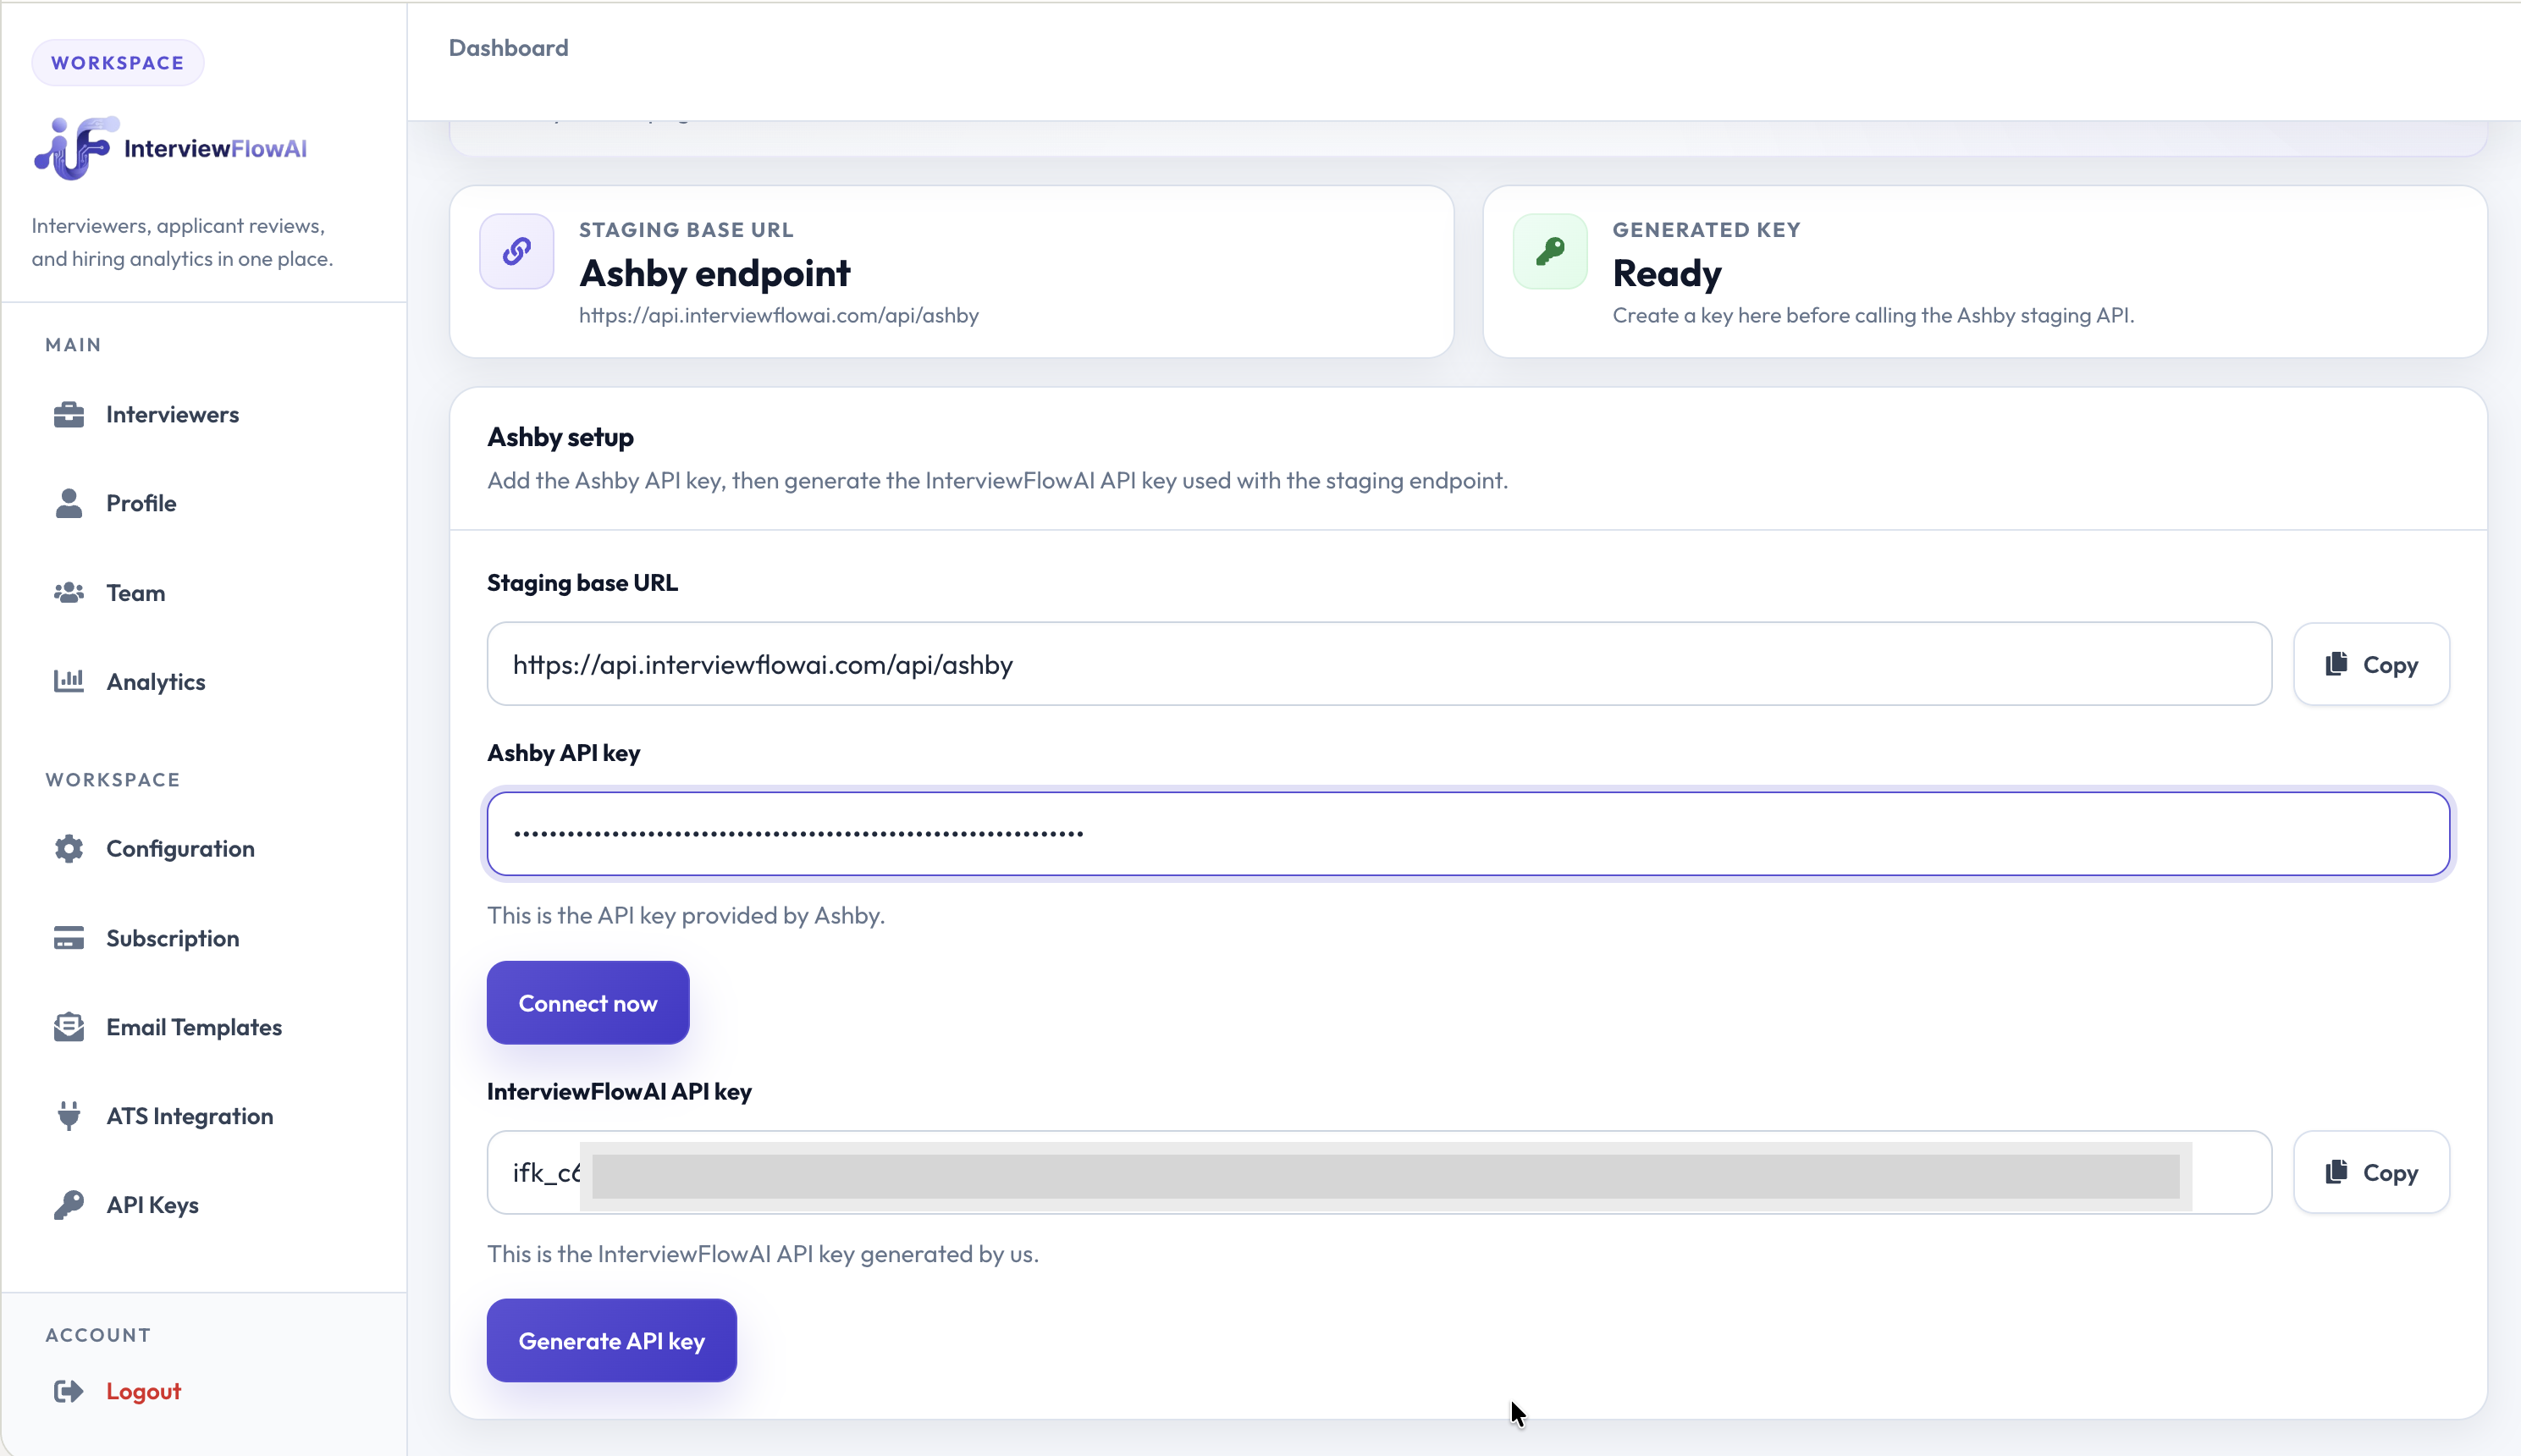
jobsRead,candidatesRead, andcandidatesWritepermissions. - Return to the InterviewFlowAI portal, paste the Ashby API key, and click Connect.
3. Add InterviewFlowAI assessments to Ashby Interviewers
- In Ashby, navigate to the specific Interviewer and click Interview Plan → Add Activity.
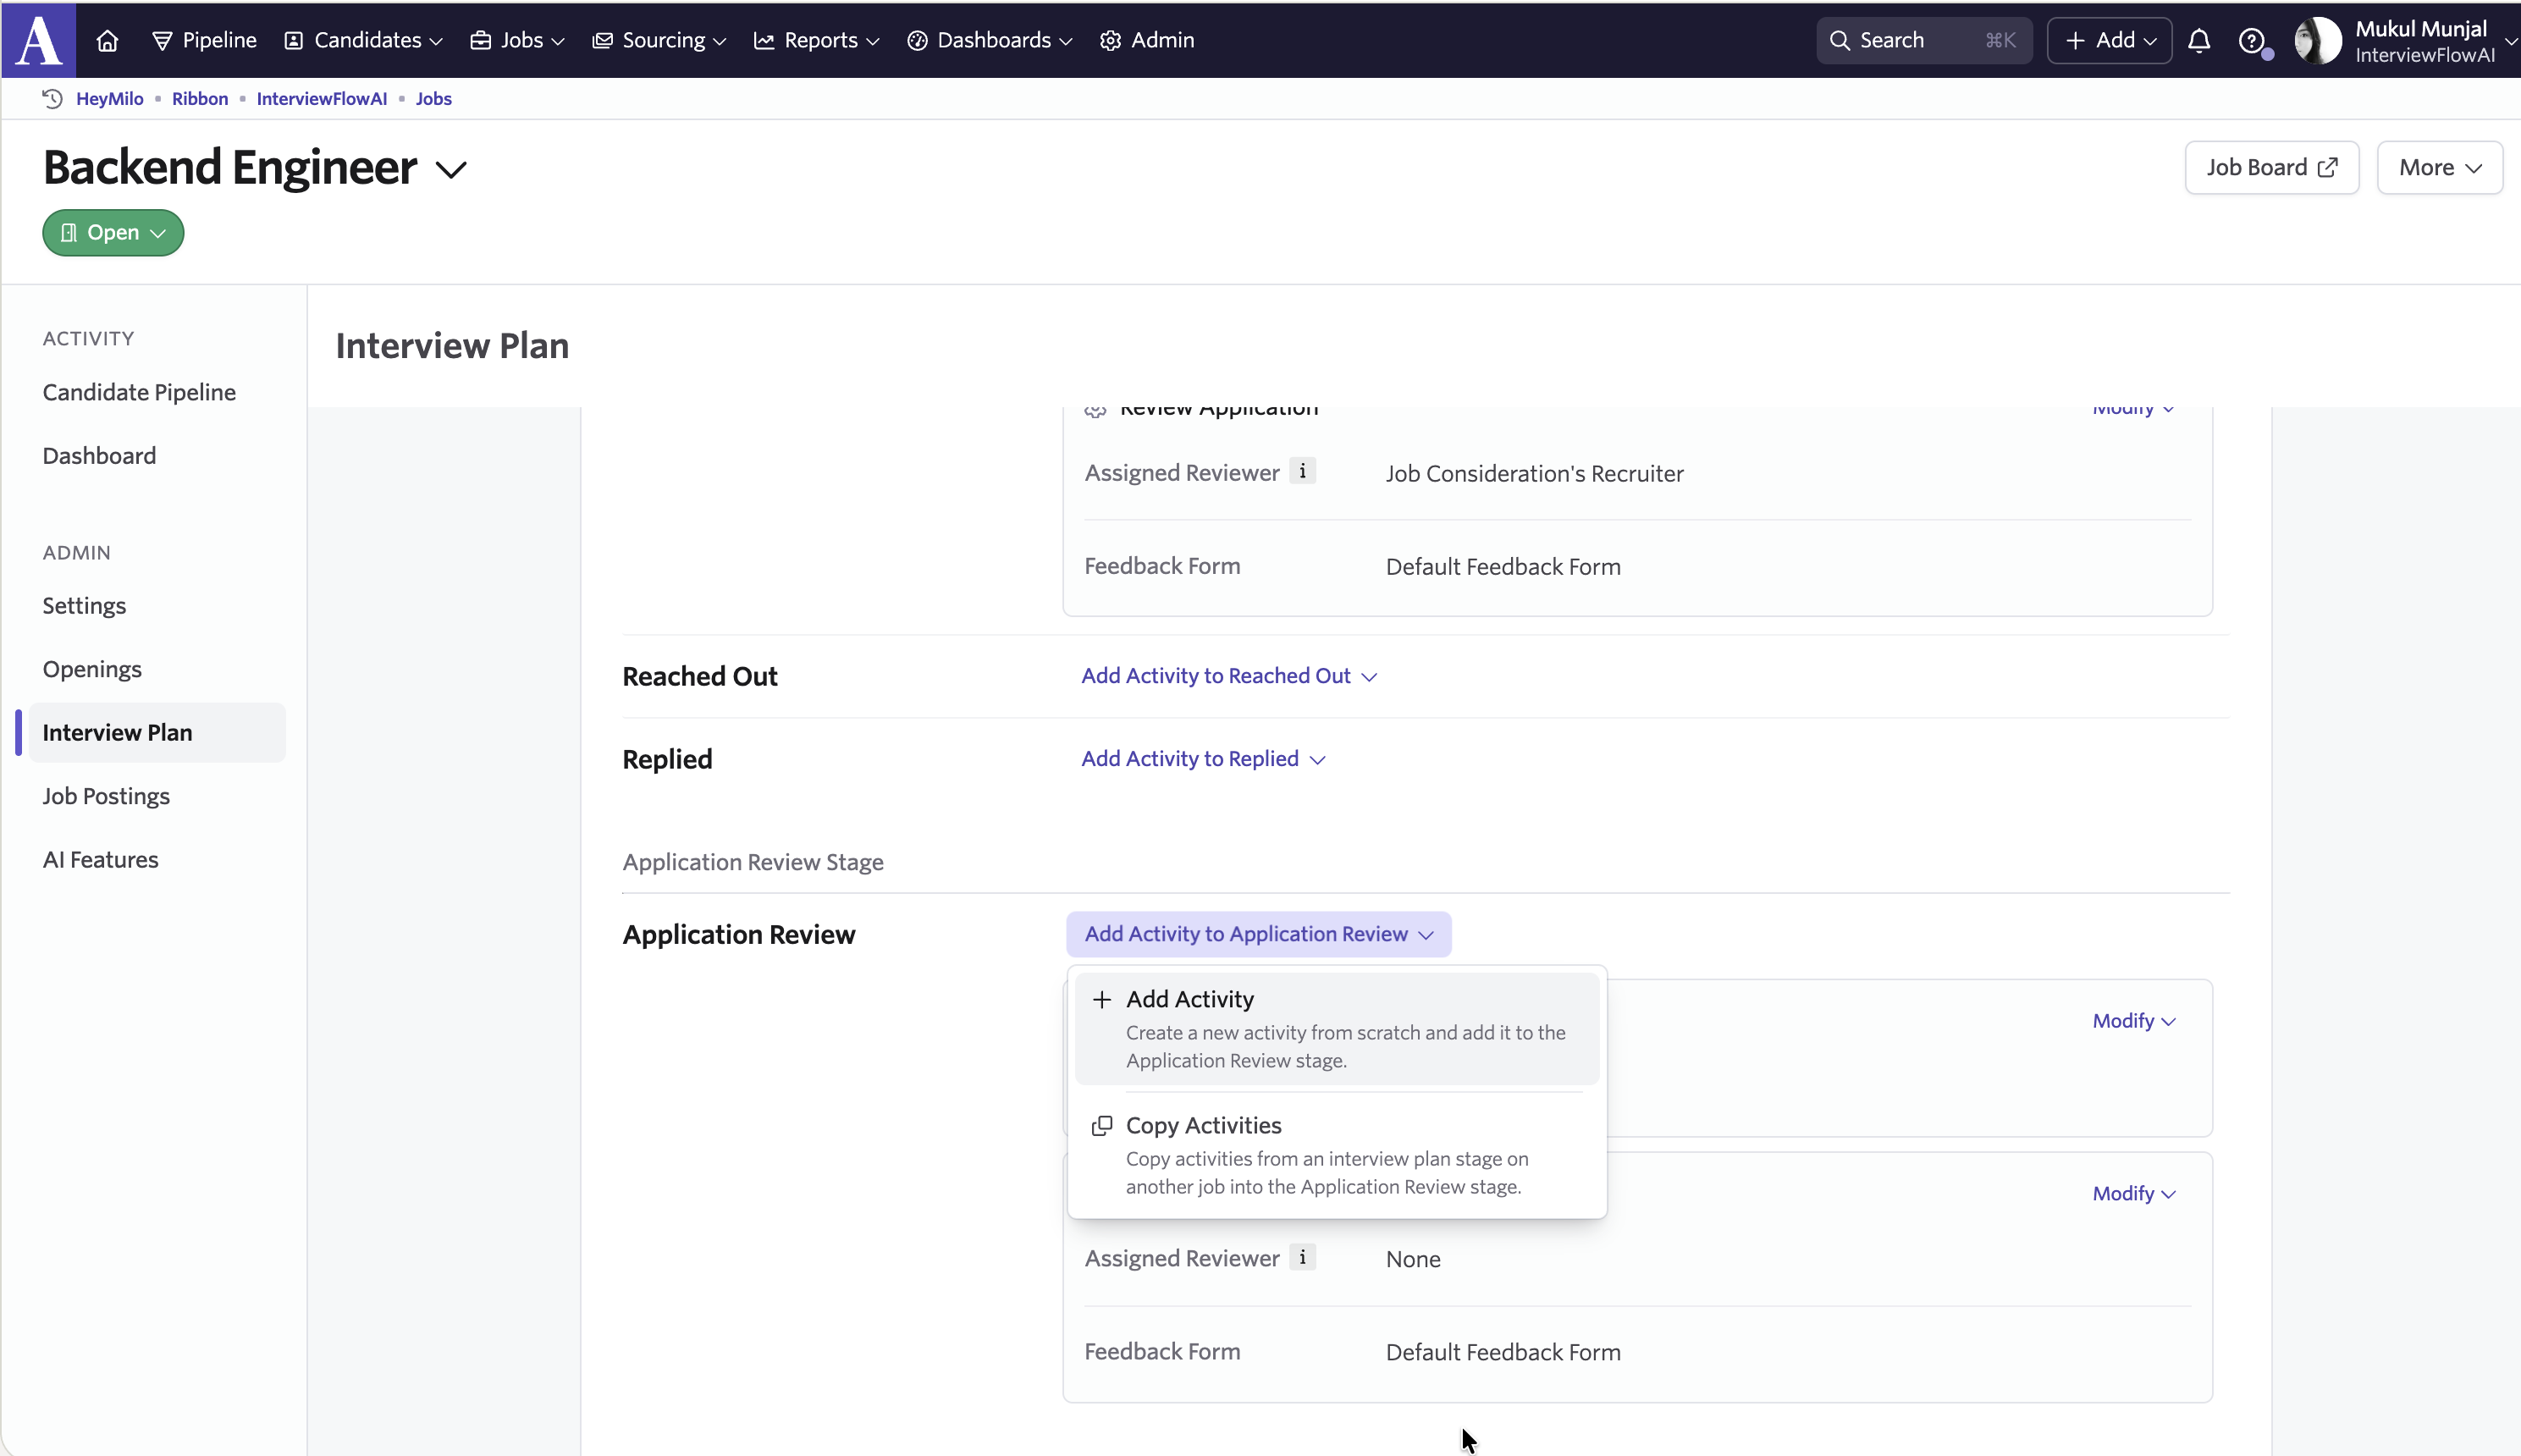
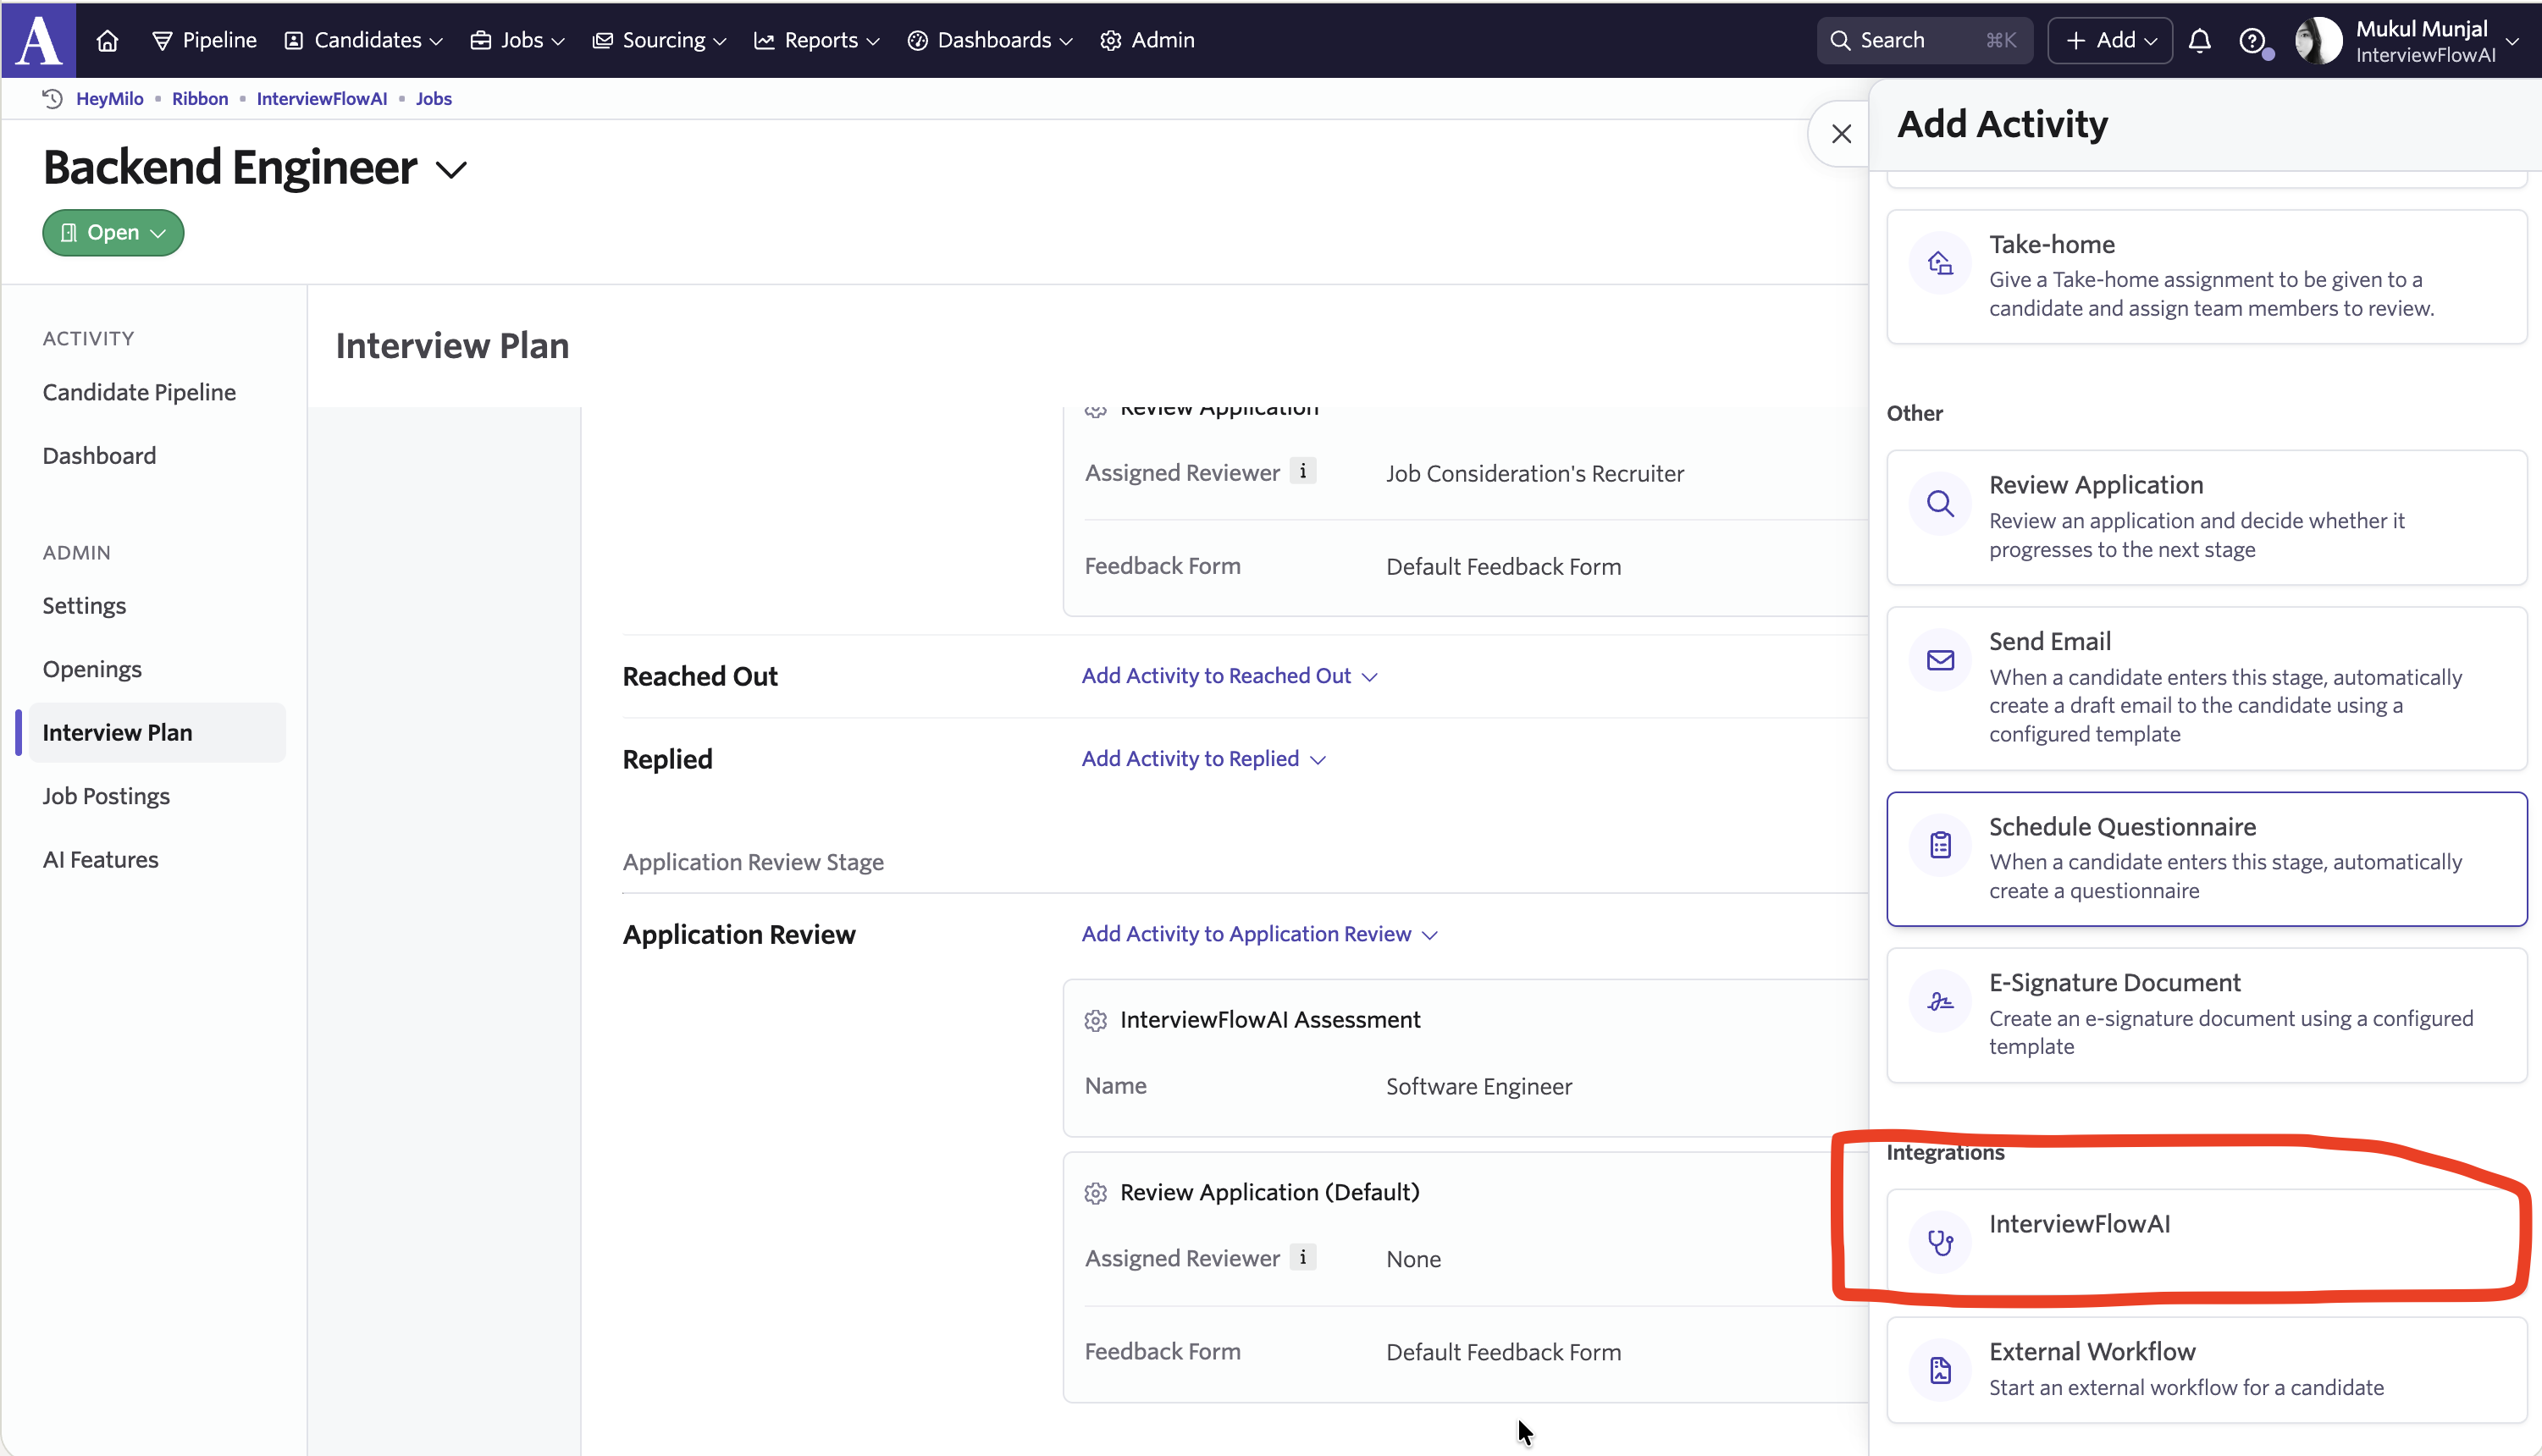
- Select InterviewFlowAI under the Integrations section.
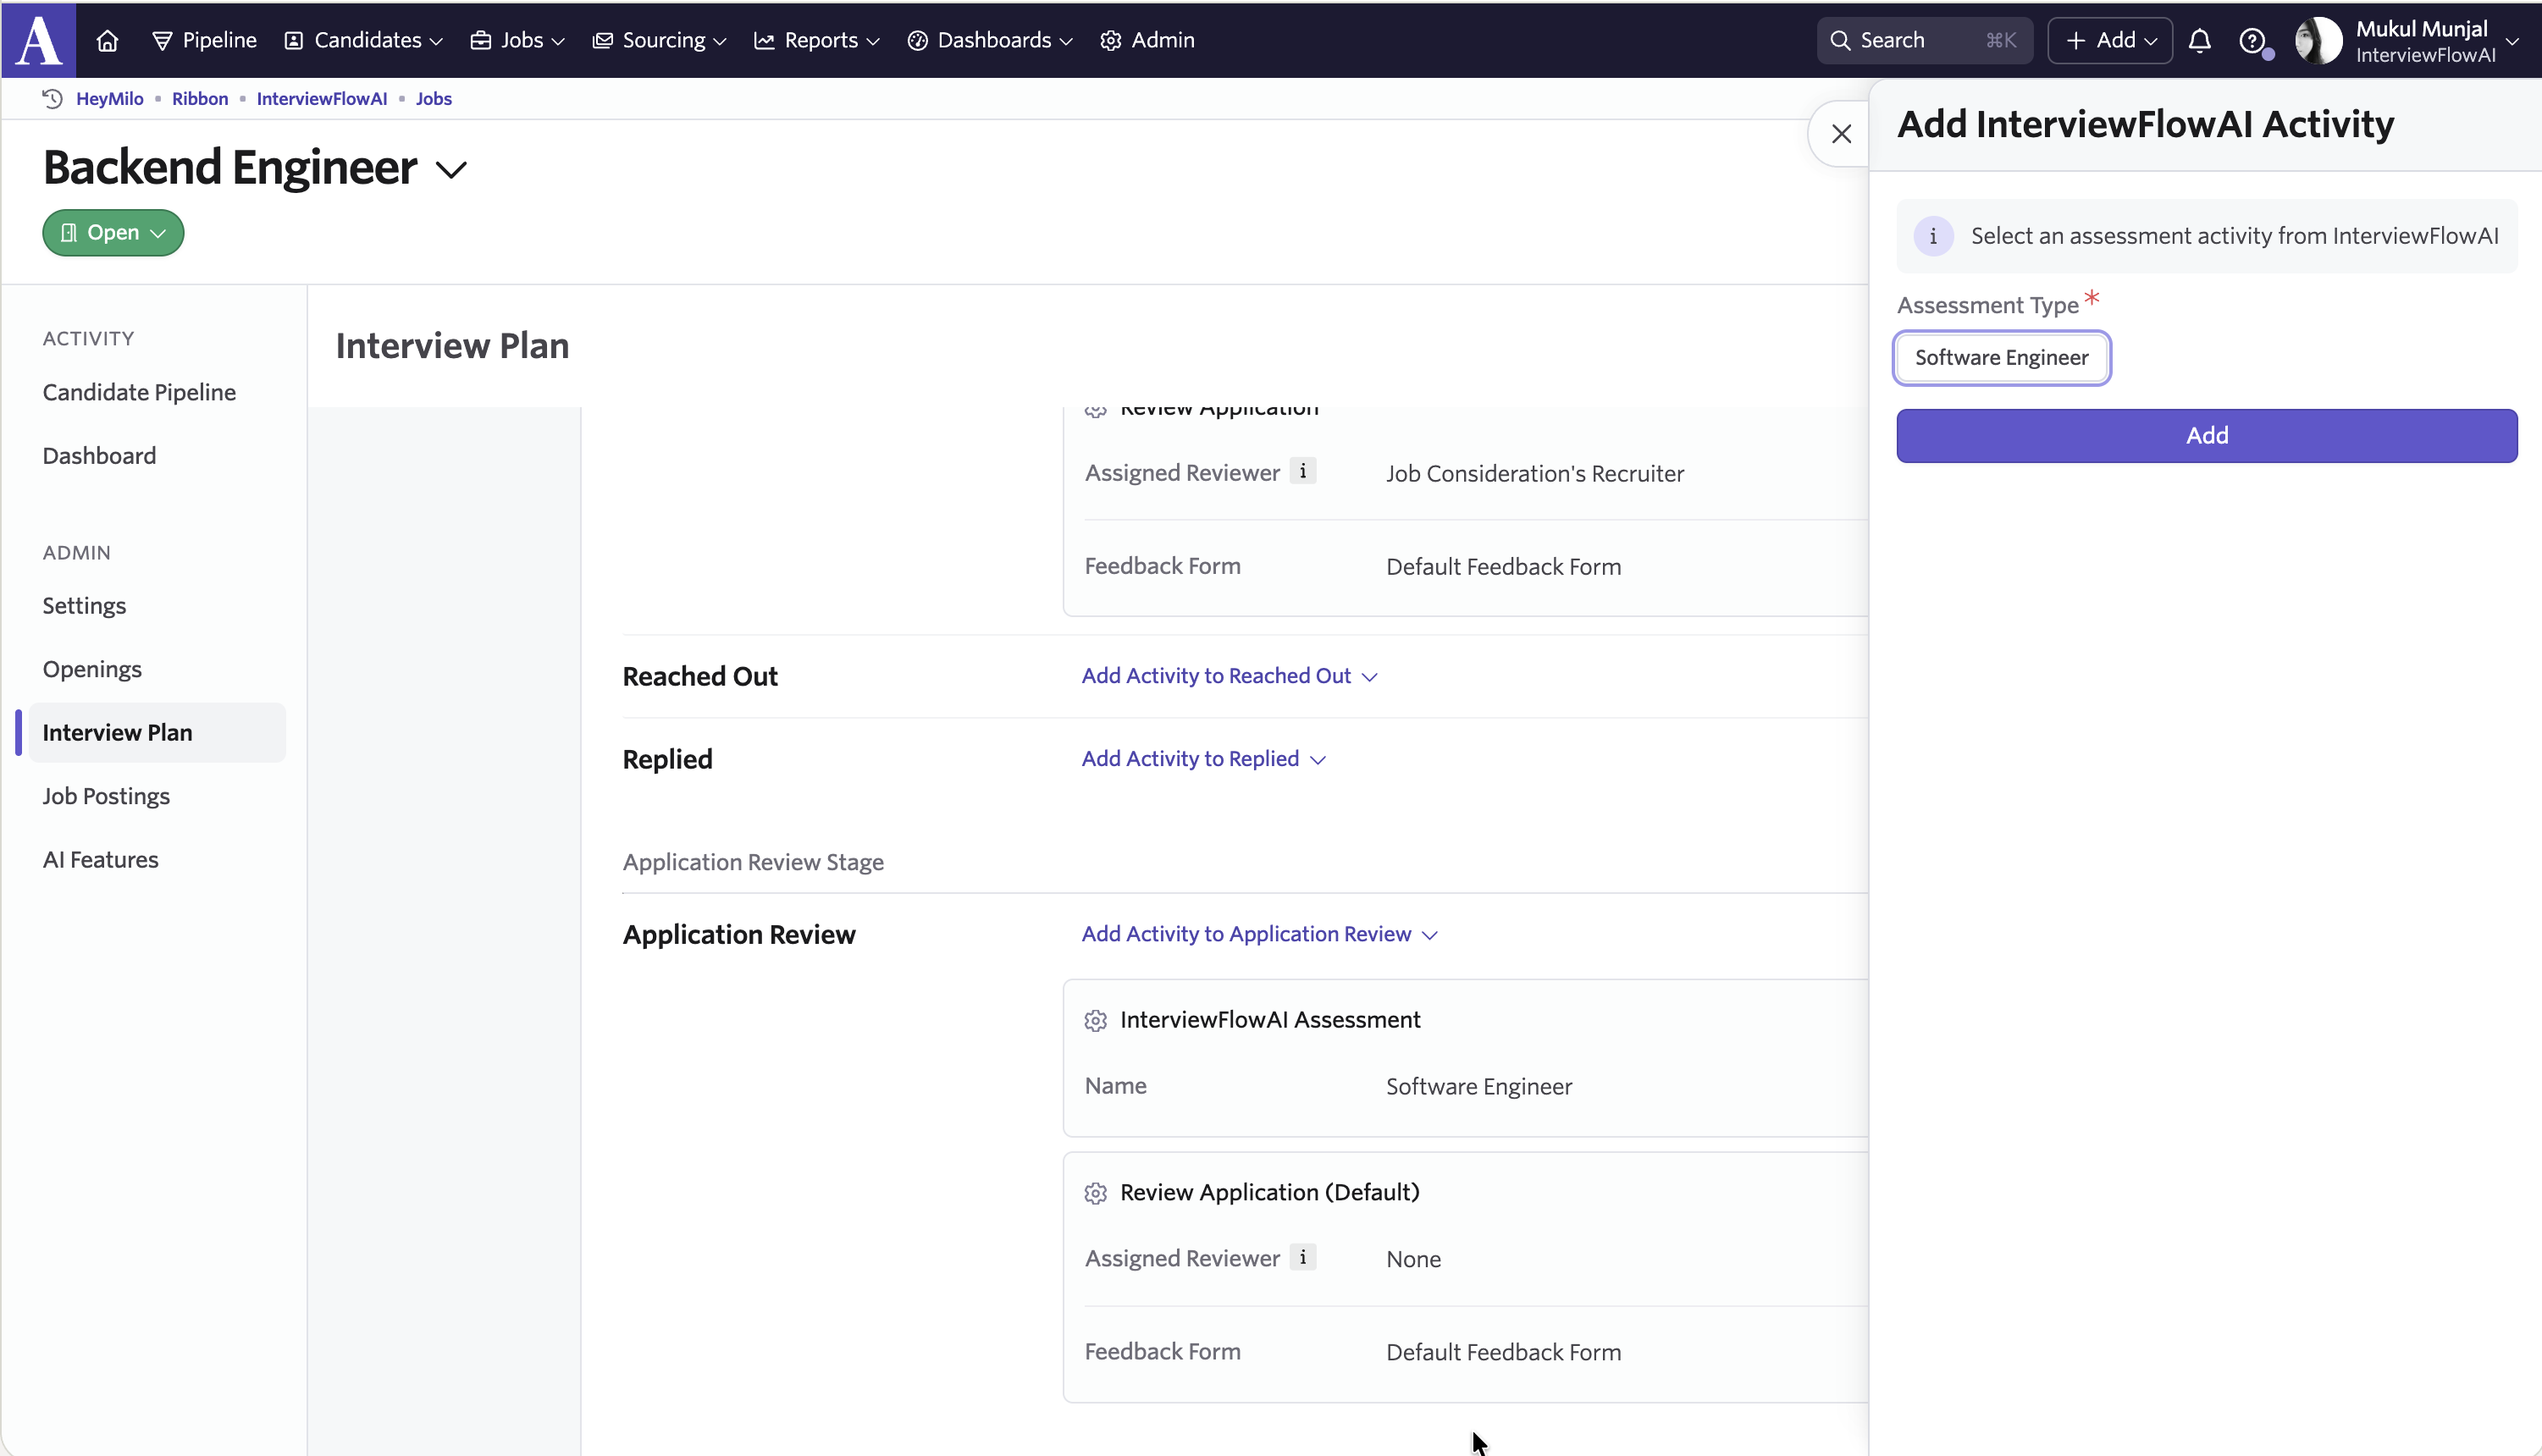
- Choose the assessment you’d like to add (e.g., Software Engineer), and click Add.
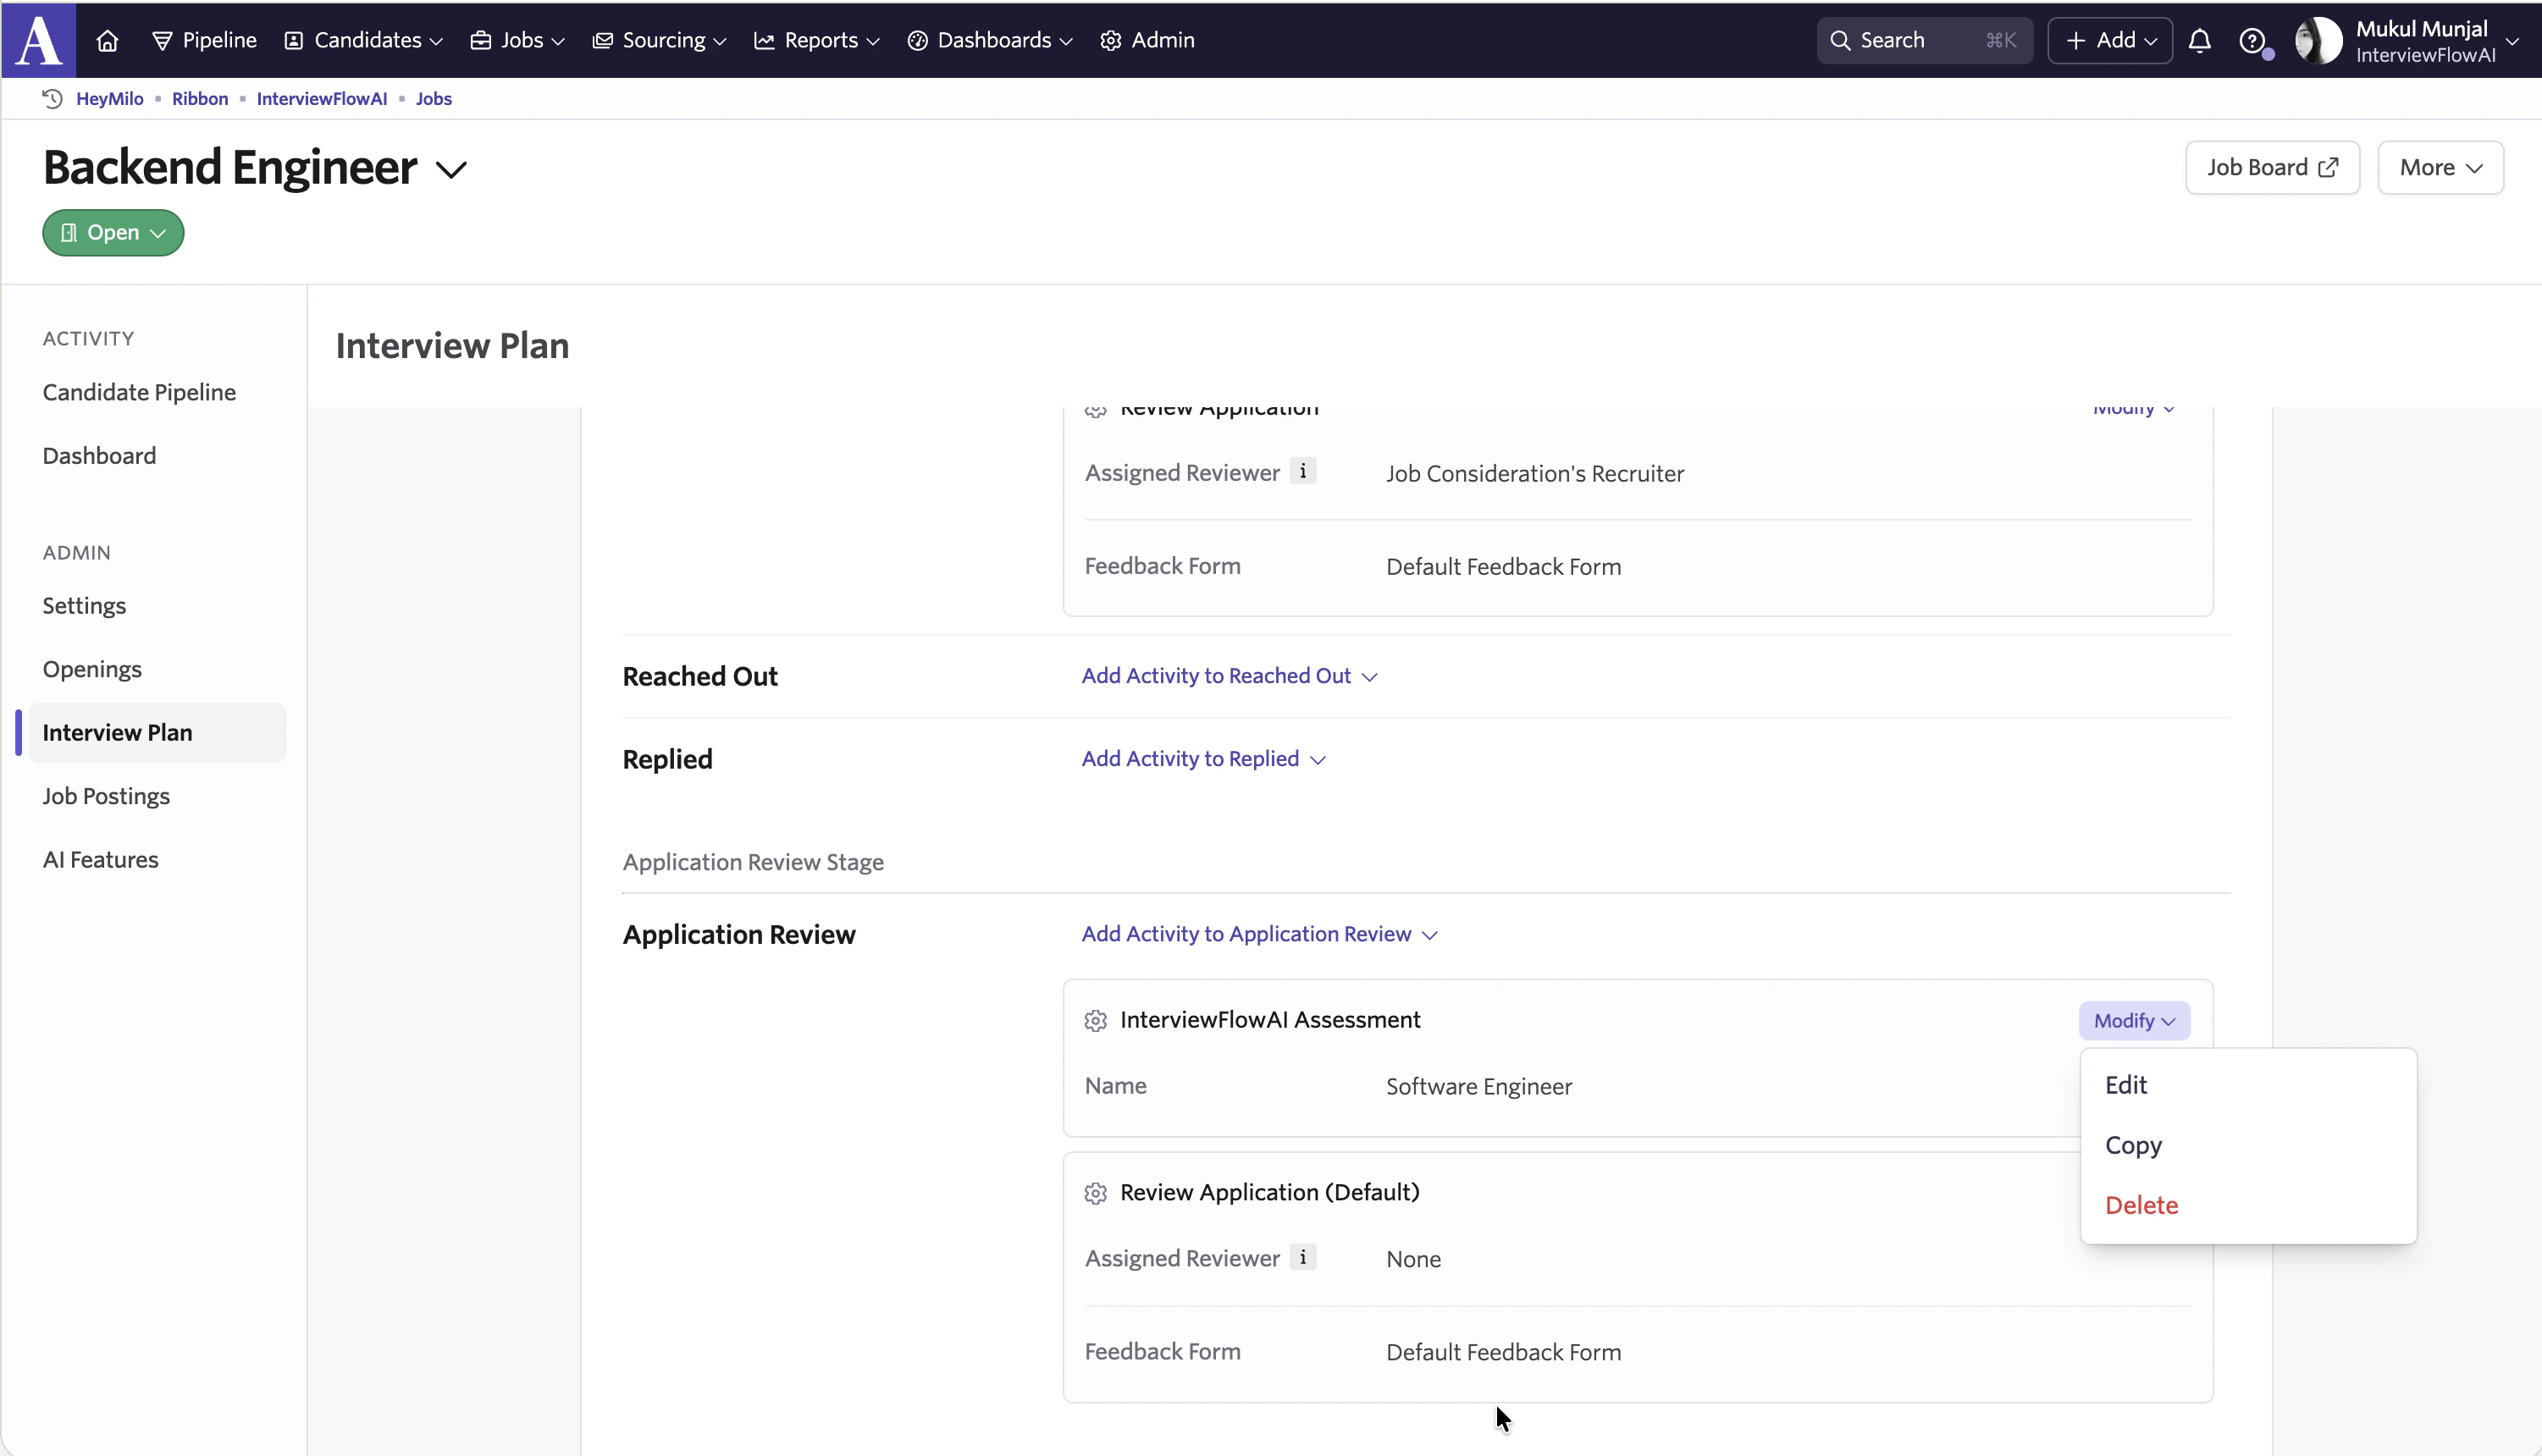
- To automate the dispatch of the InterviewFlowAI interview, click Edit beside the InterviewFlowAI integration.
- Navigate to the Automation tab and select Automate on Stage Entry.
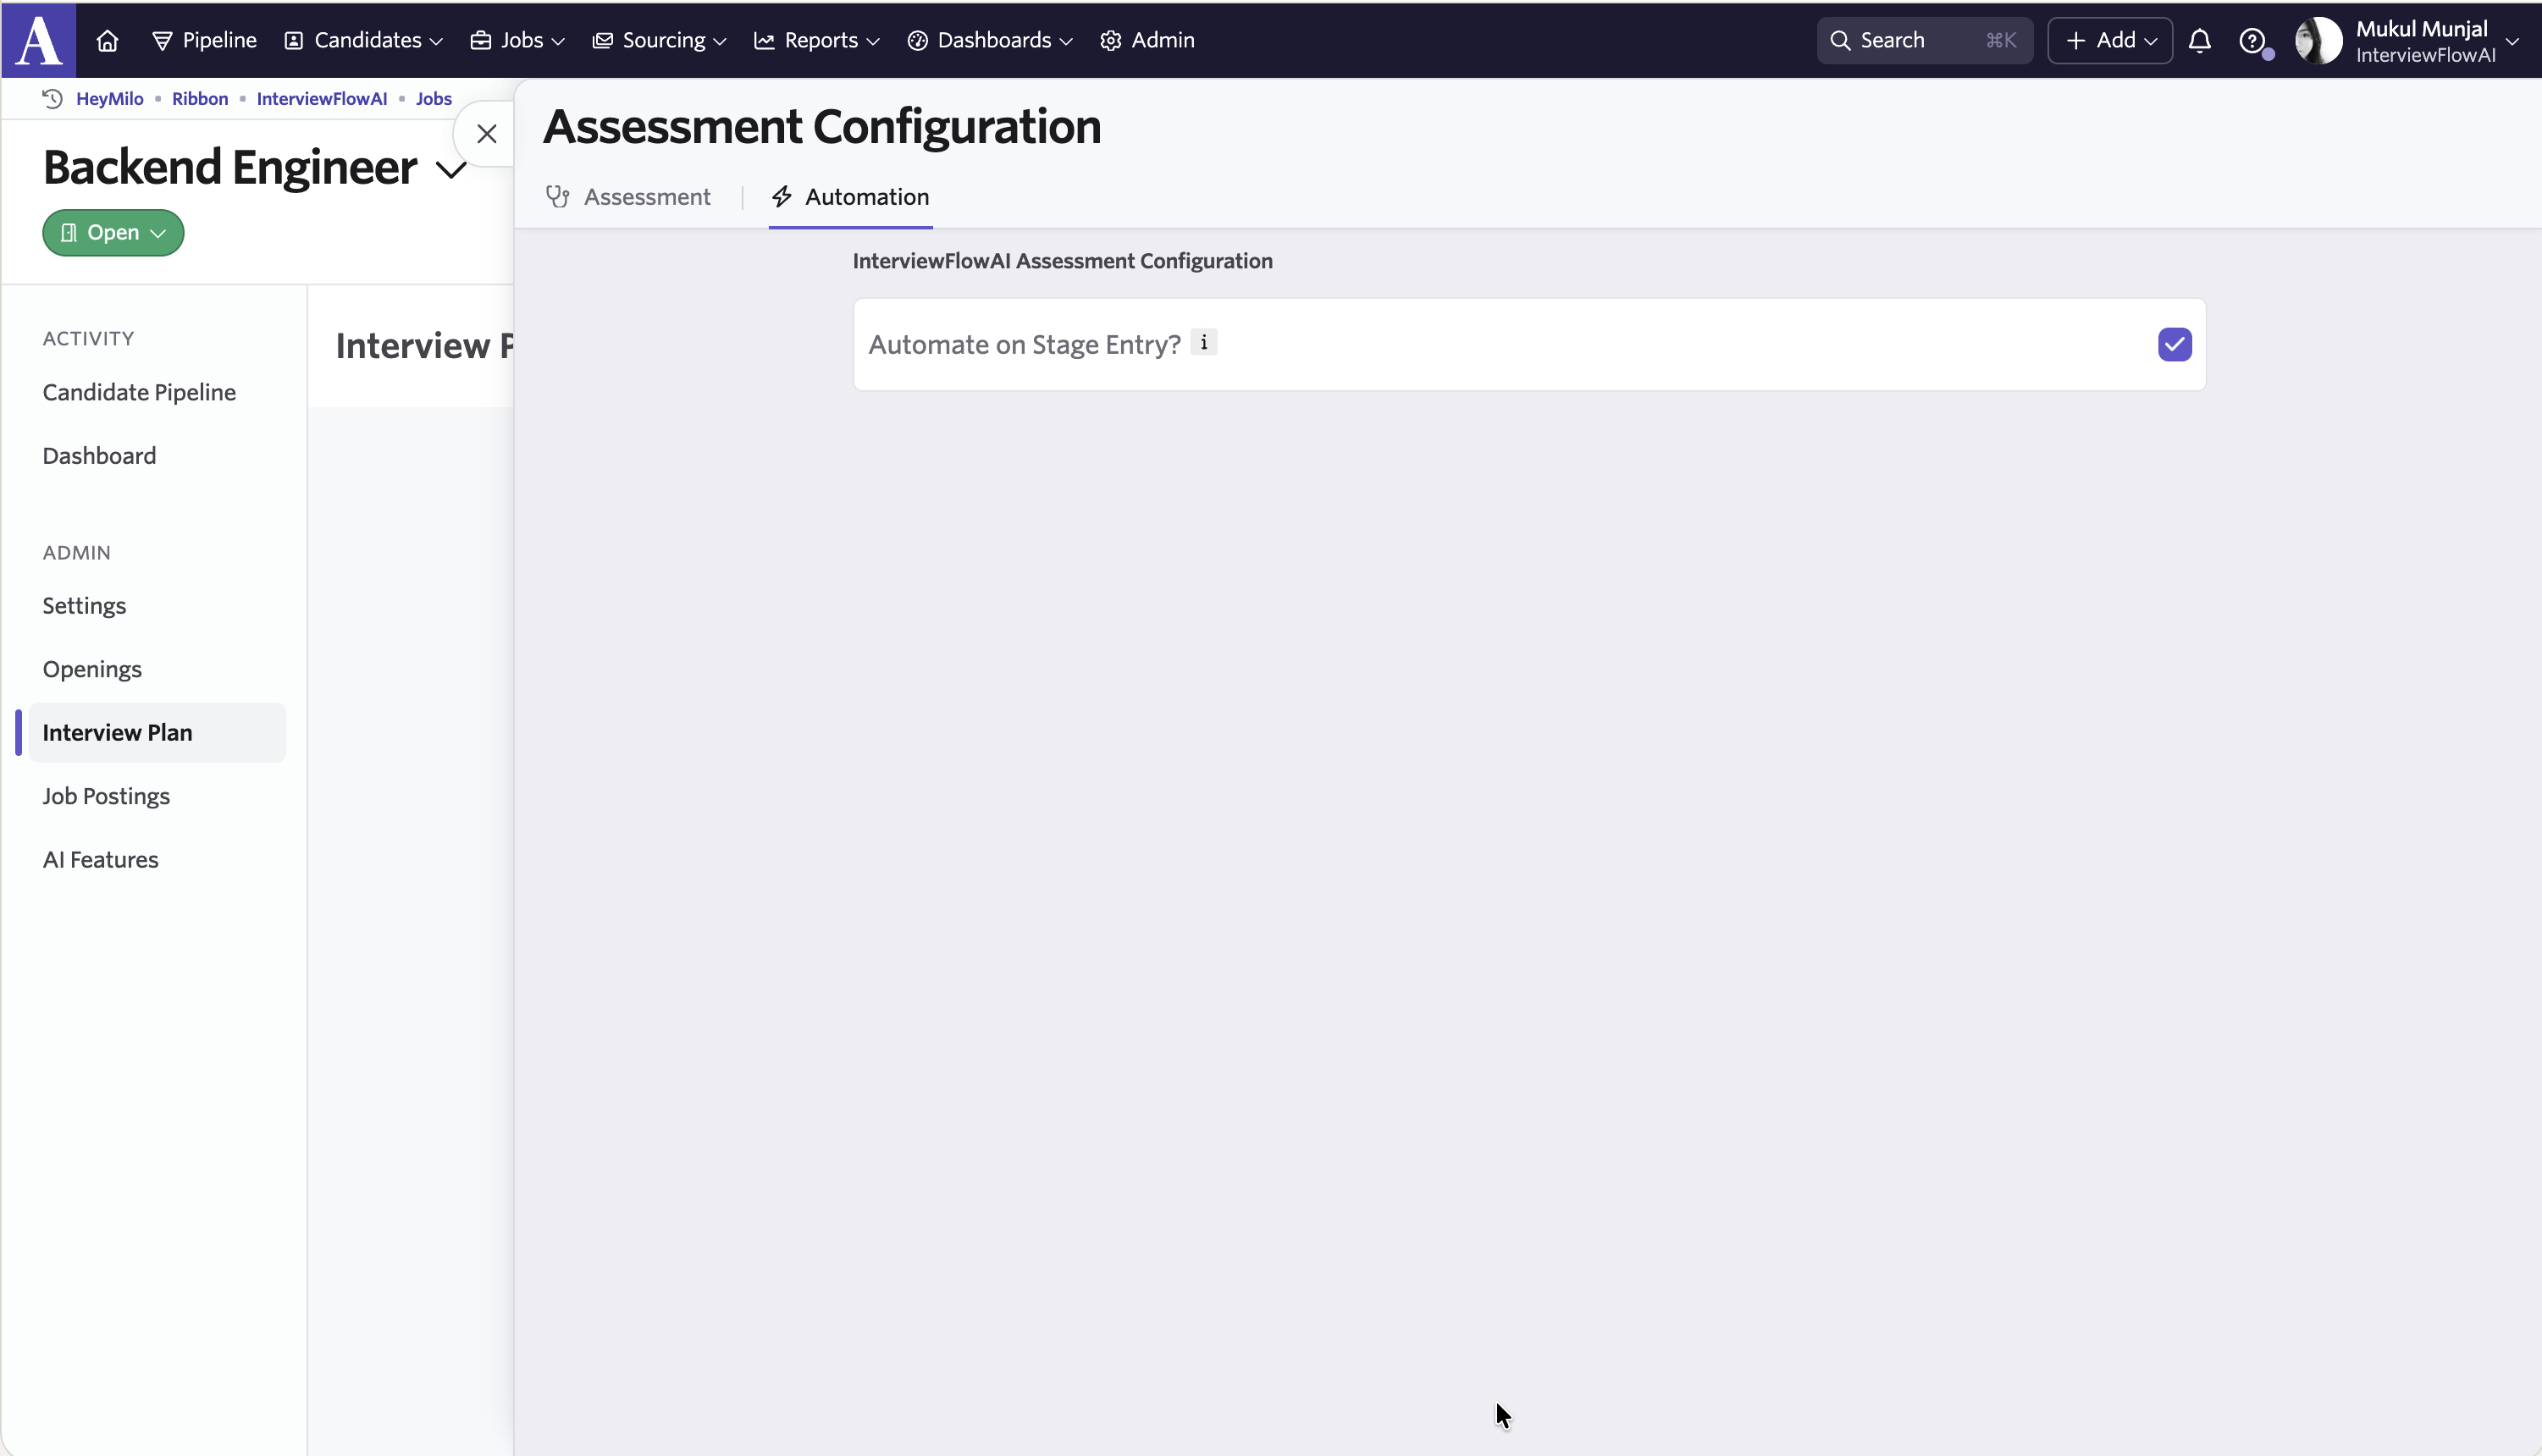
- Choose Start Assessment.
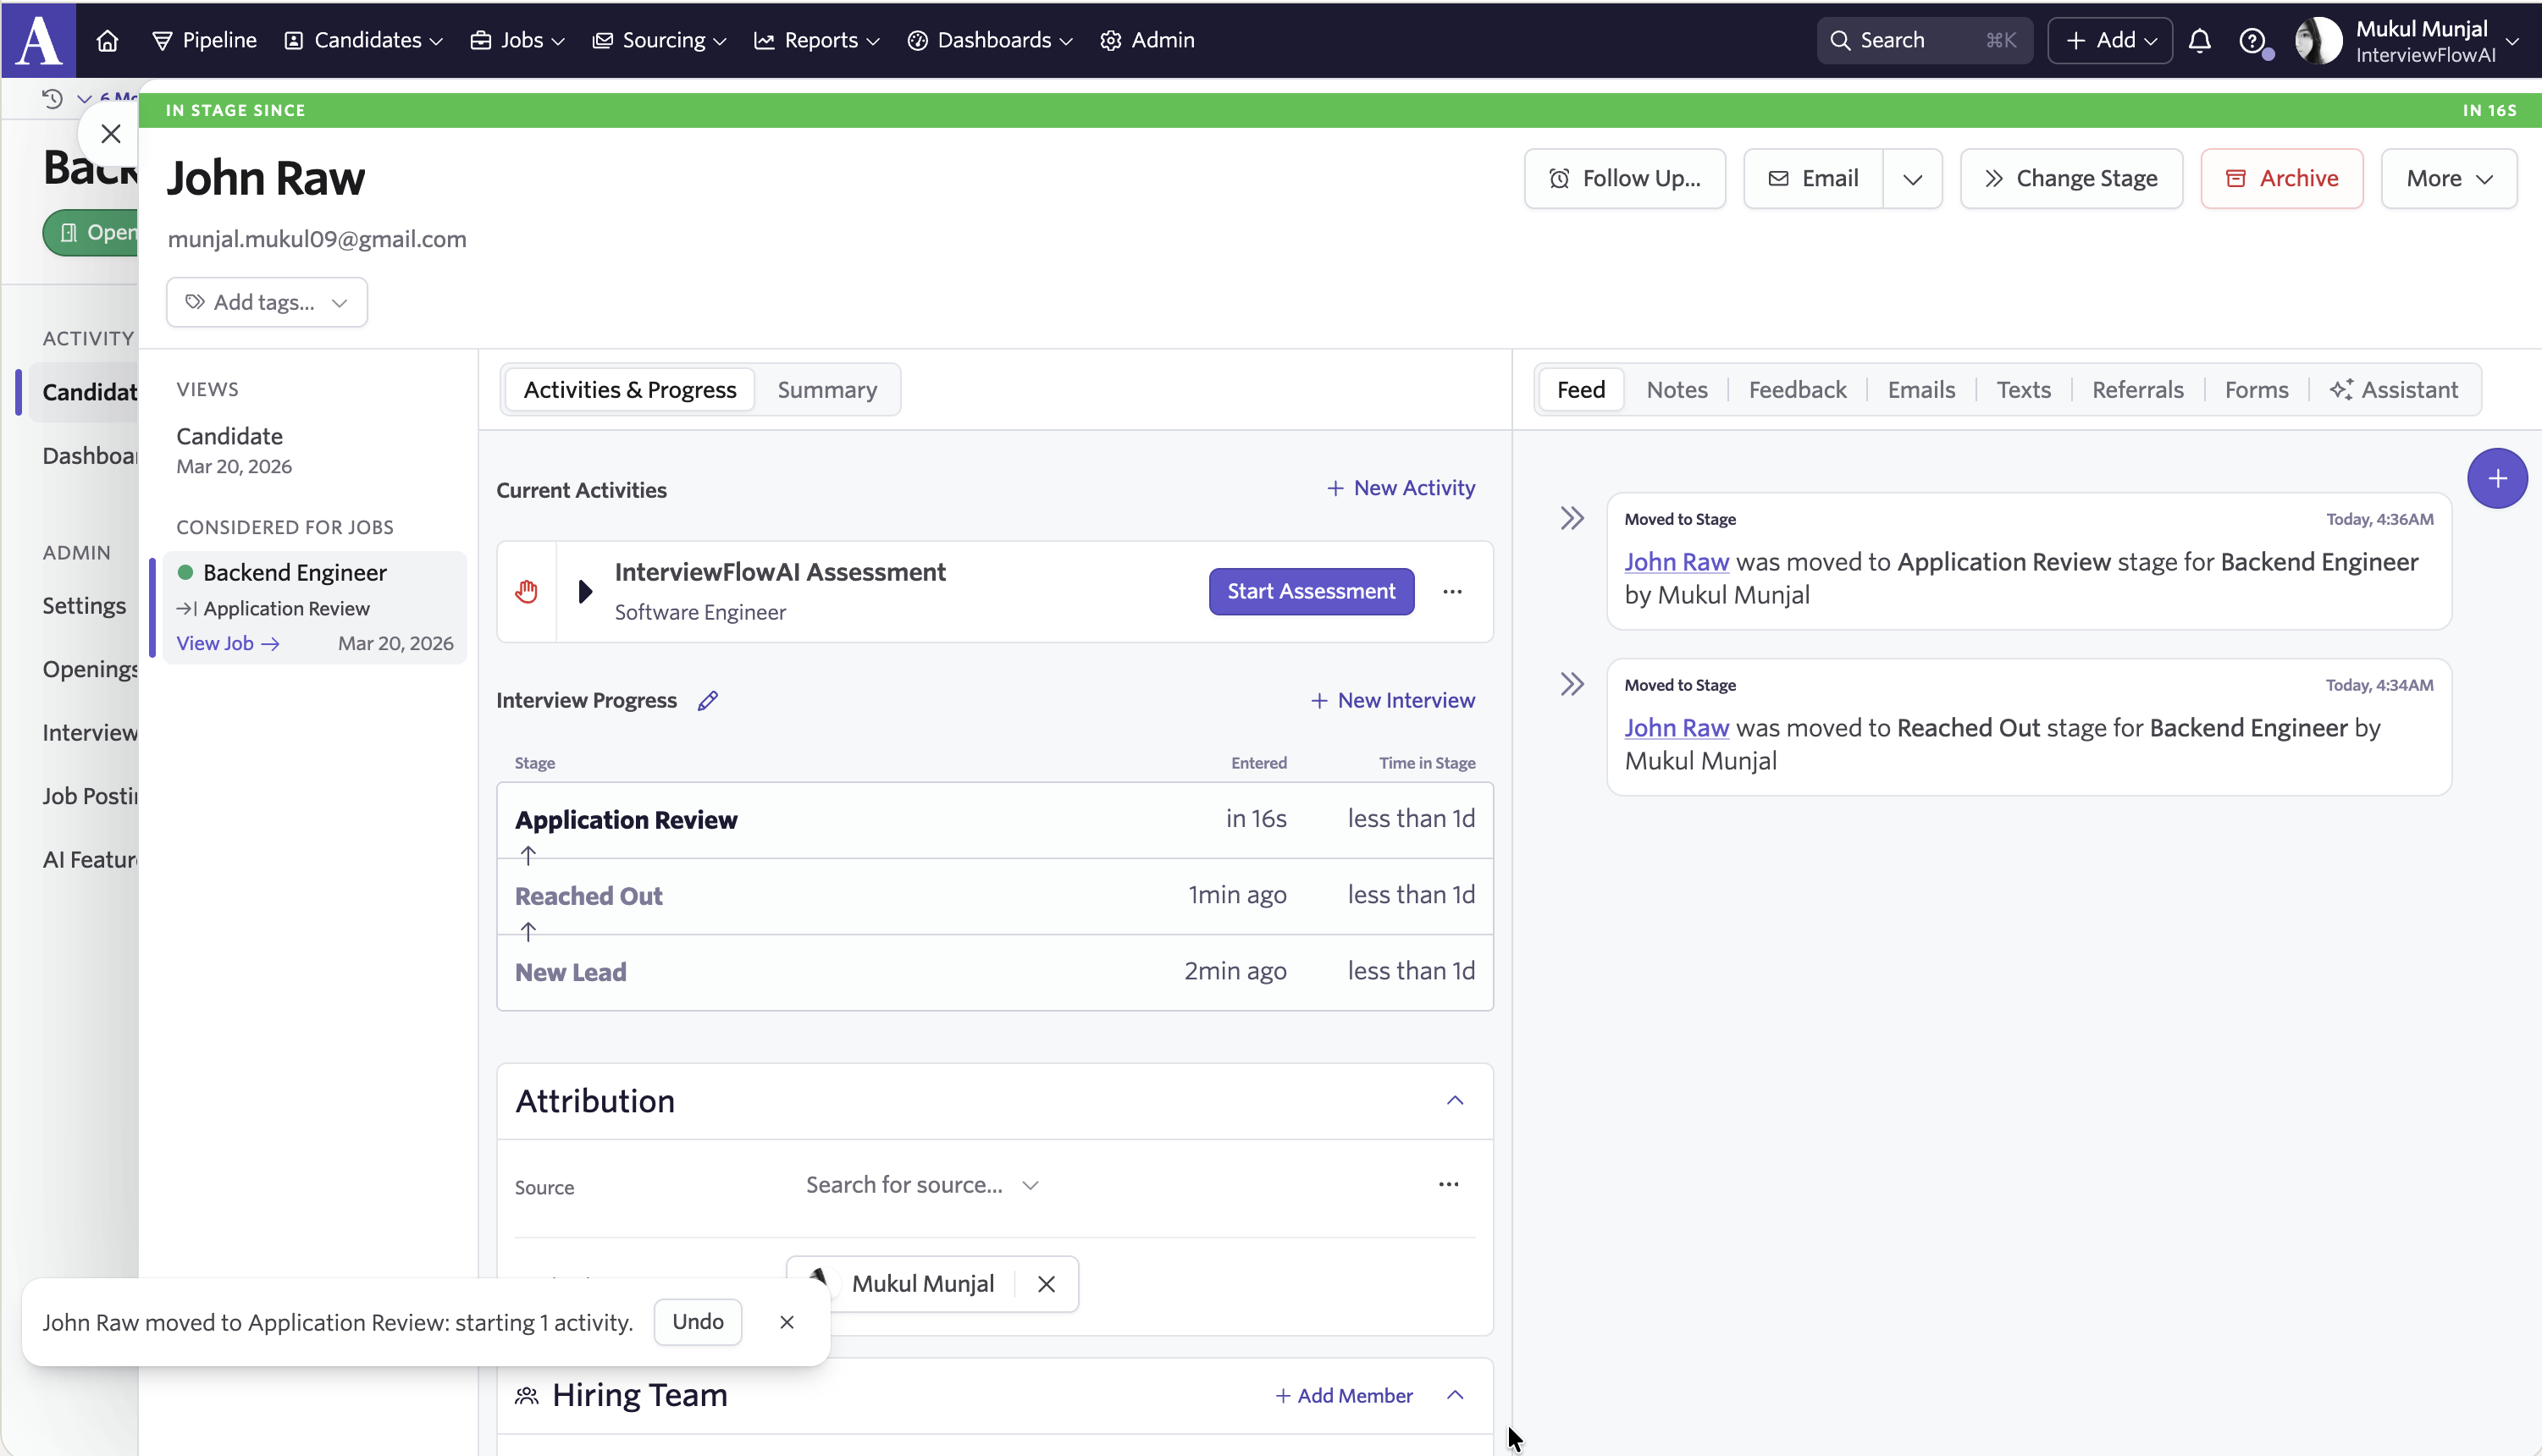 Once initialized successfully, you’ll see the assessment link sent to the candidate displayed in the Ashby interface.
.png)
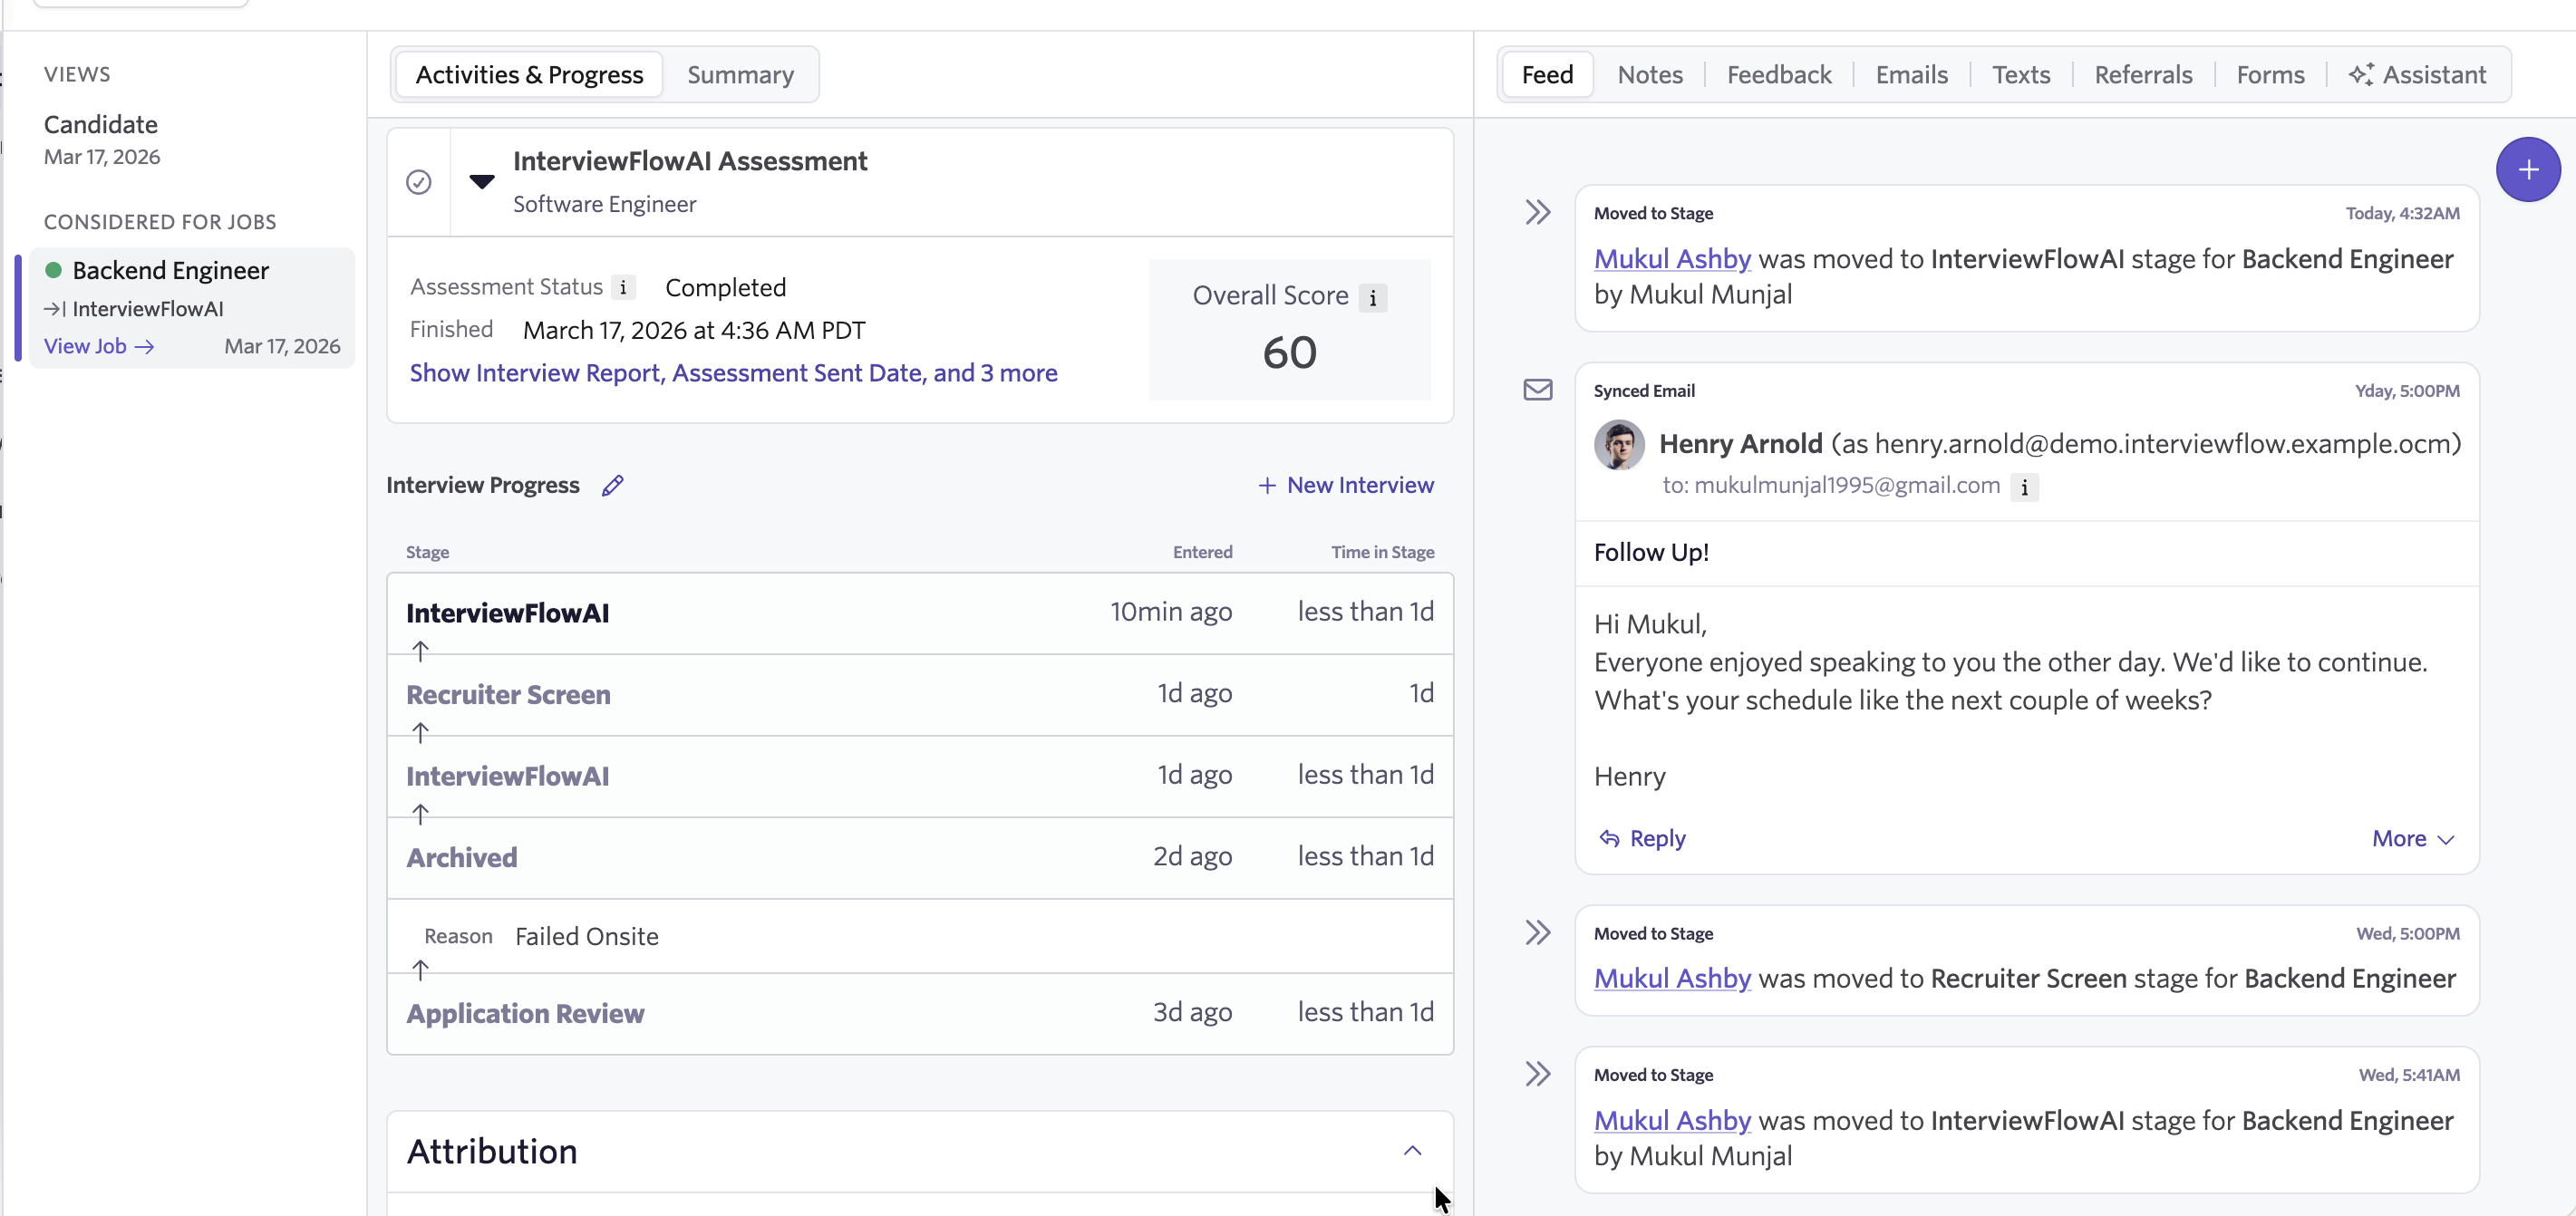
How do I review screening results in Ashby?
- After the candidate completes their interview, the results will automatically be available on their candidate profile in Ashby.
- Assessments will be marked as completed. The score will be updated along with a detailed report and interview media link(s) to audio/video screenings.
 Need help? We’ve got you. Our 24/7 multilingual support team is here for both you and your candidates.
Happy hiring!
Need help? We’ve got you. Our 24/7 multilingual support team is here for both you and your candidates.
Happy hiring!